
Do you want to know how to edit footer in WordPress?
The footer is an often overlooked part of a WordPress website, however, this is an area of your site that you should pay close attention to as it includes some very important information and basically serves as a summary of your website.
In this article, we will show you four methods you can use to edit footer in WordPress so let’s get started.
What is the WordPress Footer?
First of all, what is the footer area in your WordPress website and what is it for?
You’ll find the footer if you scroll all the way down to the bottom of your website (or somebody else’s for that matter). For instance, here’s what Hubspot’s footer looks like:
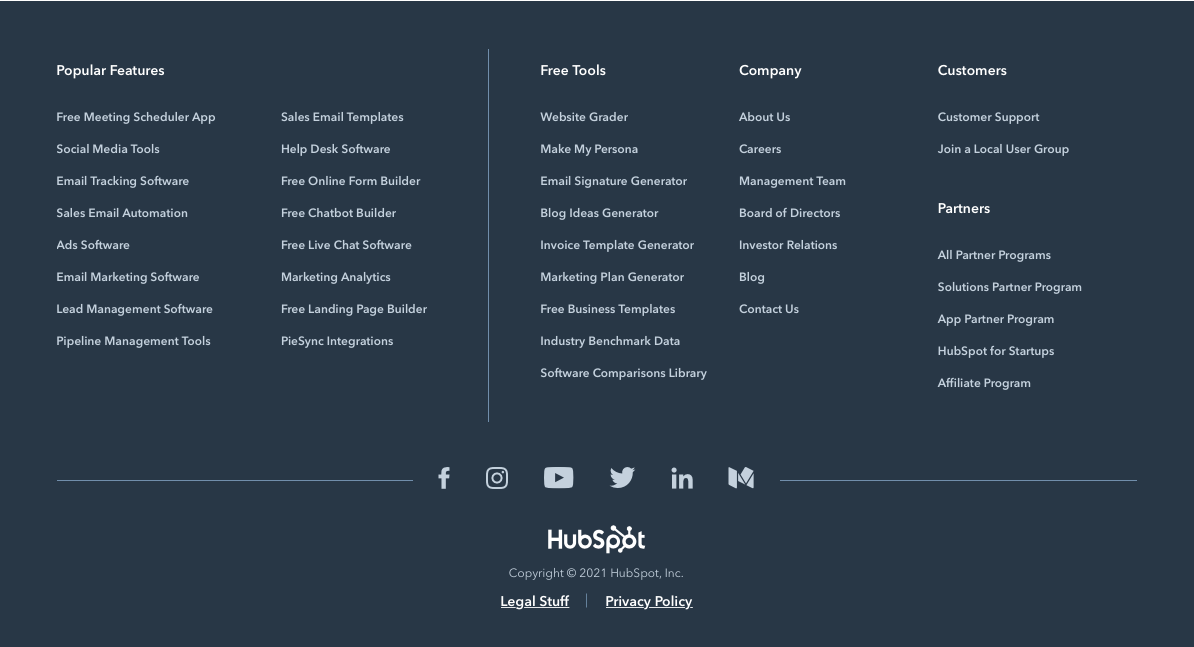
As you can see, this area contains some important information and links and it serves as a sort of a summary for the entire website.
How so?
The footer will appear on all pages of your WP site so you shouldn’t ignore it. This area can include links to your “Contacts” and “About” pages, “Terms of Service”, “Privacy Policy”, as well as some other important links and it stays the same on all of your pages.
All this information is very important for your visitors to easily navigate your site so you want to give it a good look. If your footer looks all over the place, the rest of the website won’t fare much better either.
With that in mind, let’s take a look at how to edit footer in WordPress.
⚡ Check also: How to Justify Text in WordPress
Edit Footer in the Customizer
Editing the footer in the Customizer is probably the easiest way to do it, but exactly how much you can customize it here largely depends on the WP theme you’re using, so we wanted to show this method first.
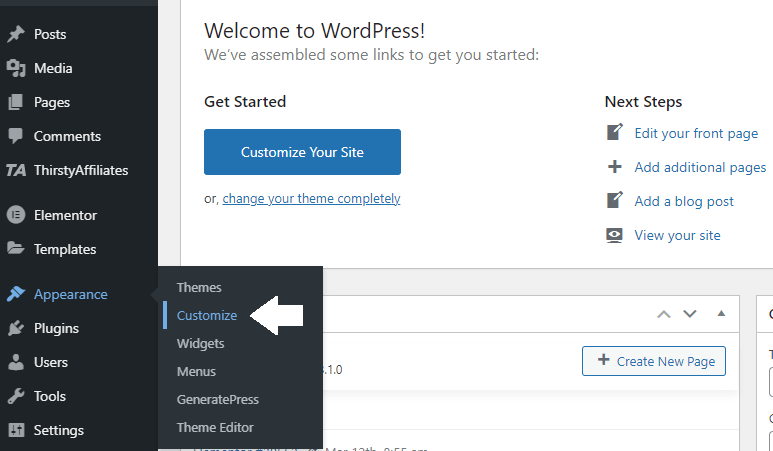
To start editing your footer in the Customizer go to the Dashboard >> Appearance >> Customize:
This will open the Customizer for your WP theme.
Note: Remember that different themes may have different Customizer, so it’s a good idea to first familiarize yourself with the theme before making any drastic changes.
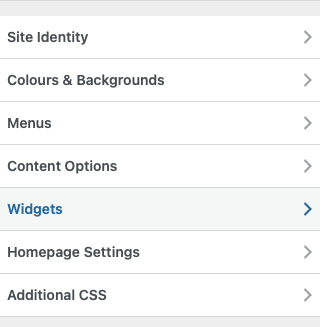
Once you’ve opened the Customizer, find the footer section.
We use the GeneratePress Theme for the purposes of this article so your Customizer might look different if you are using some other theme.
However, whatever theme you are using, you should have the option to change things like layout, background color and content like text, images and links at least.
Also, when editing with the Customizer, you will be able to preview the changes you are making in real-time. This can be very useful to see what the footer will look like before you hit the “Publish” button and save the changes you’ve made.
Edit the Footer Using Widgets
In general, there are two parts of the footer:
- The widget area
- The bottom bar
The widget area, or the main area of the footer, usually includes menus, links, images and texts that help visitors navigate through your website, find product information, contact you and so on.
The bottom bar often contains copyright or endorsement text such as “Powered by WordPress” (we’ll show you in a bit how to remove this text and add your own for better branding).
Now let’s see how you can add widgets to your WP site, because this is how you add items in the footer. The widget adding process is, fortunately, the same for all themes.
How to Add Widgets?
You can add widgets in two ways:
- Using the Customizer
- Via the Dashboard
Let’s take a look at how to do it using the Customizer.
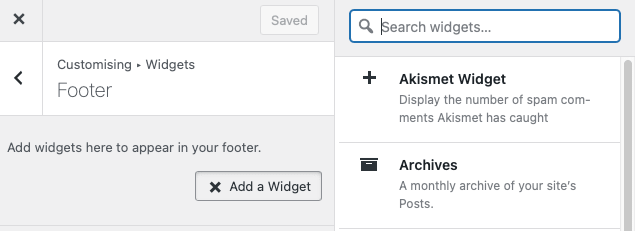
Open the Customizer as we showed before and navigate to “Widgets” in the Customizer menu:
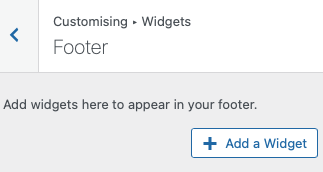
This will open different locations for you to choose to add widgets to. Since we want to edit the footer area, click on “Footer”. If you need to edit another page, like the homepage, take a look at our How to Edit WordPress Home Page post.
Select an area you want to add a widget to.
Click Add a Widget button.
This will open a list of widgets on the right that you can add. Click on a widget and it will get added to the selected location.
For example, if we want to add a calendar to our footer, we can click on the Calendar widget.
Keep in mind that some widgets might require an extra step or two before you can add them.
For example, the Calendar widget will need to have a specified Title first.
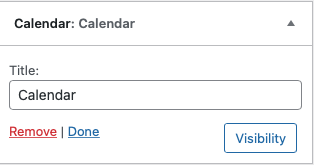
Once you’re happy with your widget, click Done.
Now all you need to do is go back to the footer editor and click Publish to save the widget(s).
How to Edit Widgets?
Okay, you added a widget successfully to your footer, but it doesn’t look quite like you want it.
Don’t worry, you can edit it and change its layout, background color, text and link color and more.
To edit a footer widget, navigate again to Appearance >> Customize >> Footer and select the Footer Widgets tab.
You should see several options here with which you can customize your widgets including options to enable or disable widgets, show or hide widget title, different widget styles, etc.
Just go through these and play a little until you make the widget the way you want it to look.
How to Remove Widgets?
What do you do with widgets that you no longer need?
You can simply remove them.
To do this, go to Appearance >> Customize >> Widgets.
Go to the customization panel and find the location with the widget you want to remove.
Click on the widget area to display a list of widgets on it.
Select the widget you want to remove and click the red “Remove” or “Delete” link. Finally, click “Publish” to save the changes.
And just like that, the widget is gone.
Edit the Footer.php File
Note: A word of warning before you decide to edit the footer via the footer.php file. This is only for those who know how to properly write and edit code, so it takes some coding knowledge.
If you’re not used to working with code, it’s best to stick to other methods we show in this how to edit footer in WordPress guide.
But if you are, you can find it by going to Dashboard >> Appearance >> Theme Editor. Once you click on the Theme Editor for the first time you should see a “Heads up!” warning like this:
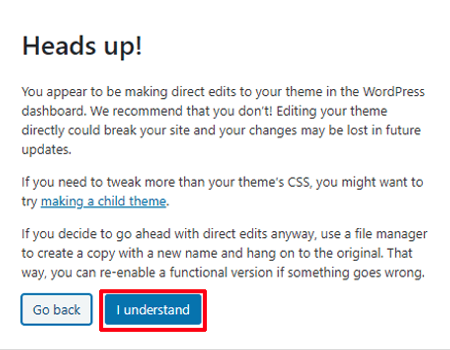
Click the I Understand button if you’re sure about knowing what you’re doing and this will open the style.css sheet.
If you look to the right, under Theme Files you’ll see a file labeled as Theme Footer (footer.php). This is the one you want so click on it.
Once you are done editing don’t forget to click the button at the bottom and your footer will be updated.
⚡ Check also: How to Add Blog Posts to Pages in WordPress
How to Edit Footer in WordPress Using Plugins?
Finally, you can edit your footer with the help of plugins.
To do this, you will first need to install a plugin. In this case, you are looking for a page builder plugin like Elementor, or Divi.
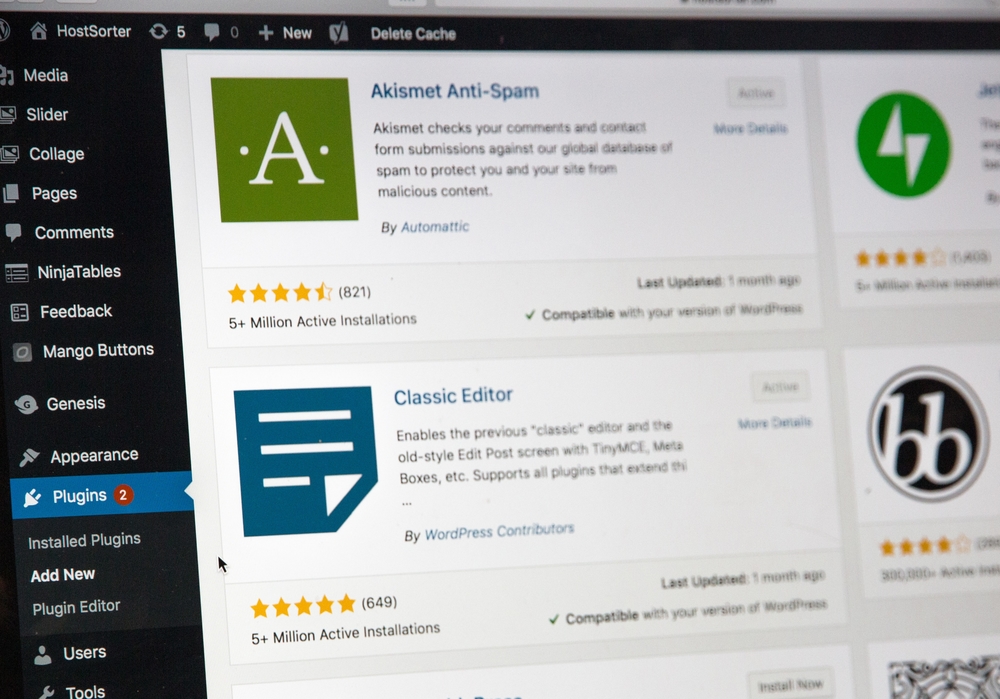
To install a plugin to your WordPress theme, go to the Dashboard >> Plugins >> Add New. This will open a new screen where you can search for plugins by name if you know how the plugin is called, or by functionality (i.e. what you want the plugin to do).
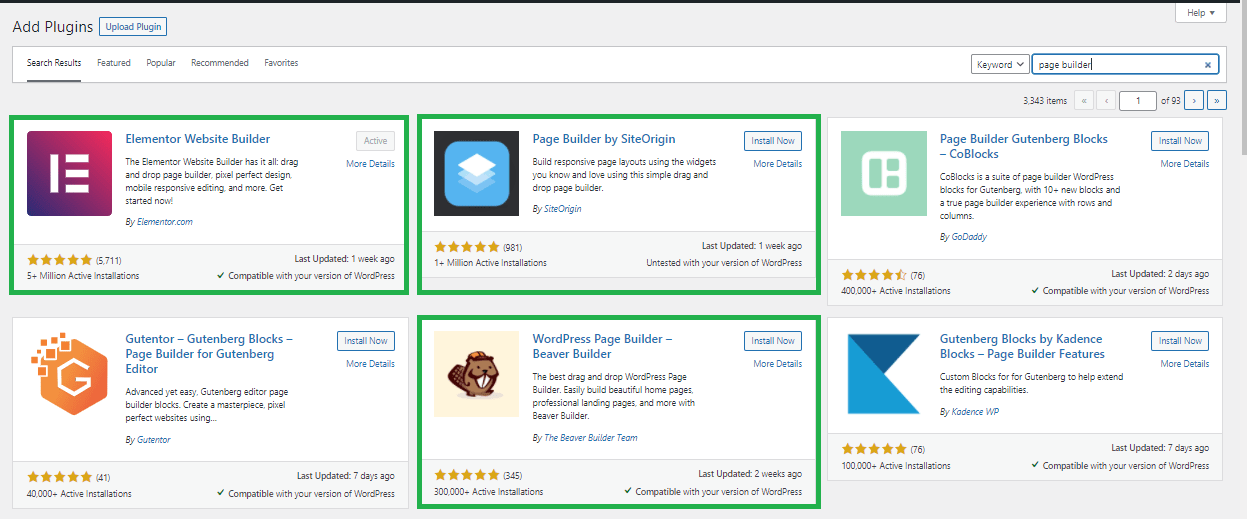
For instance, if you search for “page builder”, you should see the page builder plugins (including Elementor that we mentioned just a moment ago):
Note: Since Divi Builder is a premium-only product, it’s not available through simple plugin search on the WordPress dashboard. You can download Divi Builder from Elegant Themes official website here.
Pay close attention to these before you choose and install a plugin.
- check the star rating and how many people installed it (see below the star rating)
- when was it last updated
- and if it is compatible with your WP version
Once you’re ready, click Install Now button next to the plugin title and it will download and install.
However, to use it, you still need to activate the plugin, so be sure to hit the Activate button.
Editing Footer with Elementor Theme Builder Plugin
You can also create a custom footer (or header) using the Template Builder feature that Elementor Pro has. This can be very useful if you want to create different footers for different pages of your website. Usually, the footer is the same on all pages.
To edit footer in WordPress using Elementor plugin you’ll need to:
- Go to your Dashboard
- Select Templates >> Theme Builder in the Elementor settings
- In the next window, under “select the type of template you want to work on” select Footer and name your template accordingly (something like “new footer” works)
- Click the Create Template button
- Now you’ll be taken to the Elementor Template Library where you can choose the footer of your choice from the library by clicking Insert
- Once you’ve selected the right footer for you, be sure to modify it to match your brand and style and add links, content, colors and so on
- When you are finished, you can click Display Conditions to apply the footer to the pages you want
- Finally, click Publish
If you don’t want to use a page builder plugin to create or customize your footer, there are dozens of plugins available on WP that will allow you to do this.
For example, Footer Mega Grid Columns plugin by WP Online Support can help you to easily customize your WordPress footer (especially if you want your footer on the bigger side like Hubspot’s above) and have multiple columns, instead of just one or two that usually come with the theme.
And, if you are looking for more email subscribers, the free WP Subscribe plugin will allow you to place subscription form widgets on any place of your website, including the footer and you can customize it according to your WP theme with custom CSS. The plugin supports MailChimp and AWeber.
How to Remove “Powered by WordPress” From Your Footer?
Okay, we promised earlier to show you how you can remove the “Powered by WordPress” message from your footer and we are going to keep that promise.
The easiest method to do this is to do it through the theme setting page. You should be able to find this under Appearance >> Customize for most WordPress themes. Once you’re in, simply edit the copyright text to your liking and click Publish.
You can also use a plugin like Remove Footer Credit to do this. This ensures you don’t have to mess with the footer.php file.

Conclusion
A lot of new website owners neglect the footer area at their own peril.
However, those already experienced know how important this area of their site can be for their visitors. This area of your website contains a plethora of useful information about your business and your website so it has to look good.
As you can see, there are plenty of ways to make your footer look great and hopefully, this post will help you with that.
🔔 Check also:
- How to Edit WordPress Site?
- How to Justify Text in WordPress
- How to Change the Link Color in WordPress
- How to Add Blog Posts to Pages in WordPress
- WordPress: How to Remove “Leave a Reply”
- How to Make a Webcomic Site
- How to Edit WordPress Home Page
- Why Is WordPress So Hard To Use?
- WordPress Visual Editor Not Working
Great compilation of editing footer on WordPress for folks looking for such information .
Wonderful information, thanks a lot for sharing.