TL;DR
Here is the easiest (and recommended) way of building a new website from scratch:
1. Get a WordPress hosting and domain name from Siteground here (it’s a one-click install)
2. Get Divi WordPress theme and website builder here
3. Pick a premade template from here
4. Add the template to your new website (here is how)
5. Customize the content (and design if needed)
6. Done 😎
⏱️Time needed: 30-45 mins
Before we dive into the technical aspects of building a website, try to recall the best website you’ve seen to date.
Now, try to think: why did you like that website?
The reasons may be hard to pinpoint, but they might include things like:
- Fast website loading speed
- Simple website design
- Easy access to the information you wanted
A functional and conversion-focused website has multiple layers that make for a good user experience, but it can be difficult for you to figure all these factors out when you’re building your first website.
In this post, we will guide you through the specific steps you can take to build a website from scratch.
Important notice
This is a massive 6500+ words guide. However, we’ve tried to make it as easy and simple as possible. For this, we use a sticky left sidebar (available on wide screens only) which allows you to quickly jump between three steps of building a website and accordions which you can open for more information on specific sub-topics (these sections remain closed and don’t interrupt your reading experience until you open them).
If you have suggestions on improving this page further, please let us know at team@siteefy.com.
Why Websites Are Important?
In today’s digital world, people spend most of their time online; in fact, they spend six hours and 30 minutes each day on the internet, according to a 2019 survey.
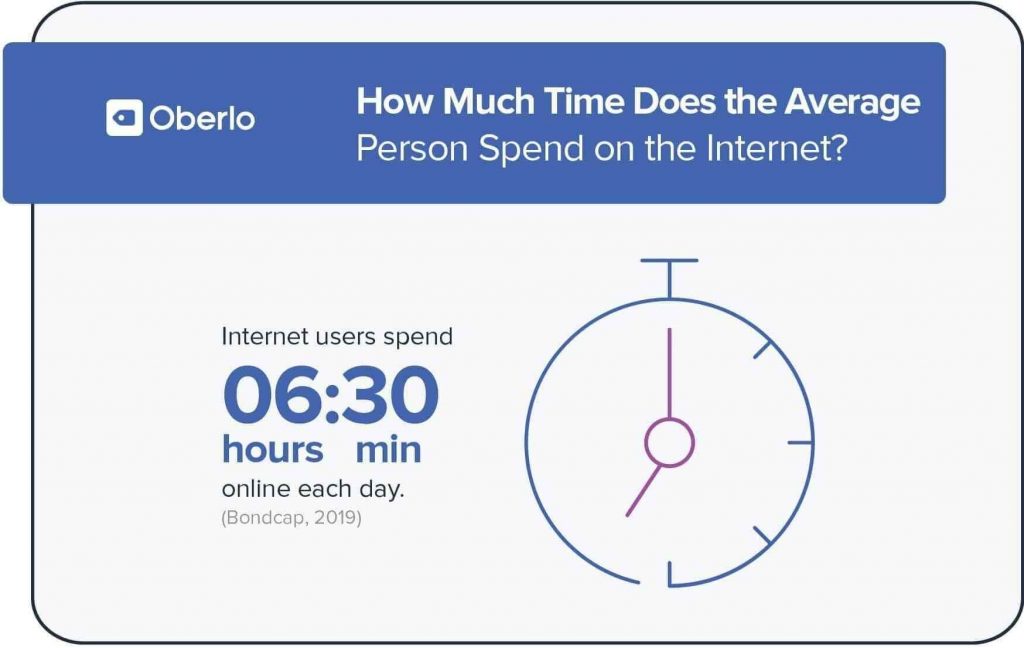
This statistic means that endless business opportunities exist today on the internet.
If you want to be a part of this huge, dynamic environment and make real money, you have to reach out and capture your part of the internet audience and cater to their needs.
Even if you’re not looking to get something in return right now, you can still build a website to:
- share your passion with others
- help people
- or work on a side hustle
Everyone should have their own digital place in the Digital Age, and building a website is so easy and inexpensive nowadays that you shouldn’t have to think twice about starting.
Increase Visibility For Existing Business
Do you already have an offline business?
If the answer is yes, then there is really no excuse for not having a website.
With a website you can be visible to thousands or even millions of potential customers, worldwide.
For example, suppose you’re the owner of a salon in New York City, and some new residents are looking to go for a haircut but they don’t know of any good salons nearby.
What will they do?
They’ll search for the “best salon near me” or “best salon [location]” and visit the business website to check the services, cost, and address, right?
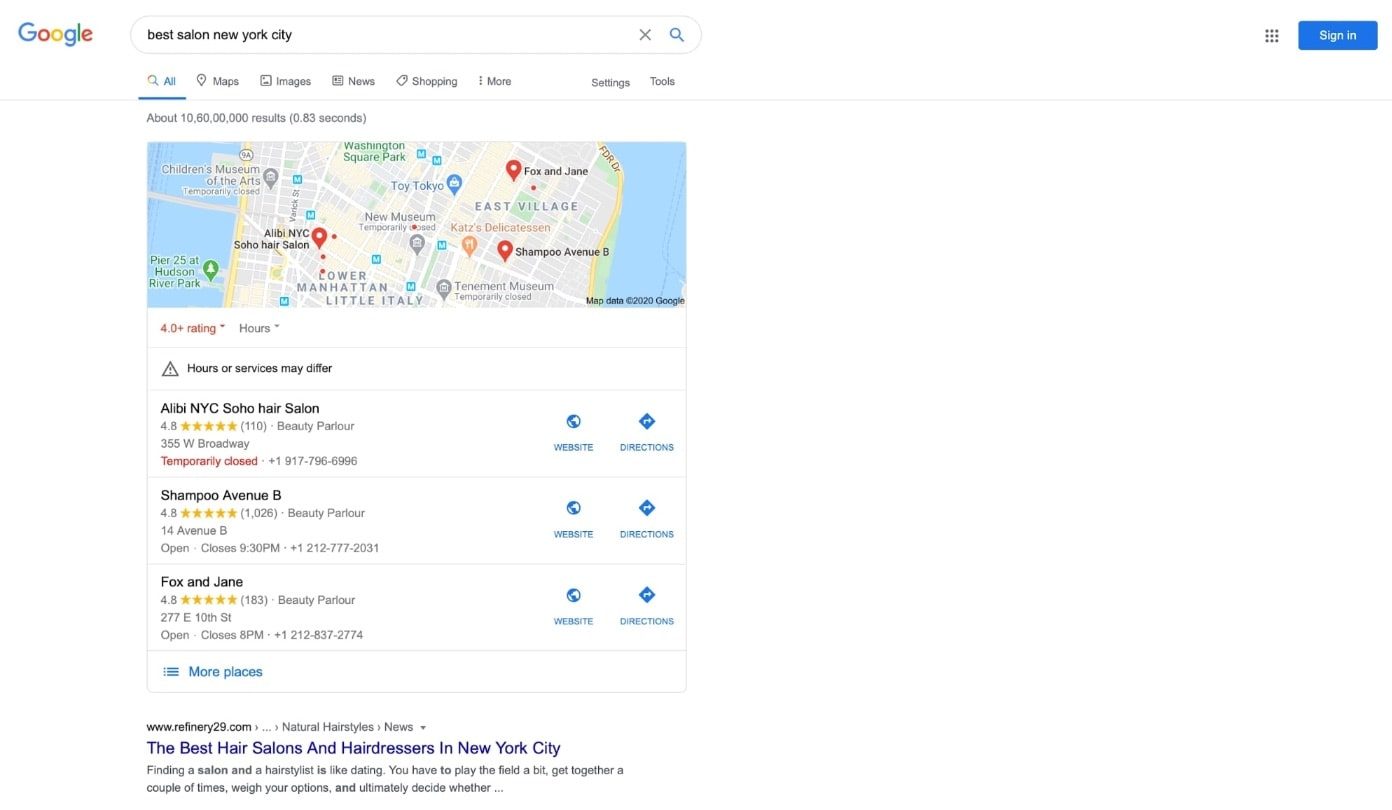
But if you don’t have a website, you obviously won’t show up in their Google search results, which will probably mean a straight-up revenue loss for you.
Of course, you can use Google My Business to set up a local business card for your shop, but a website could take your online presence to a whole new level.
Build Credibility
Building your brand’s credibility is the first thing you need to focus on if you want to make your business a local, national, or even worldwide success.
But how can a website help you build credibility?
- It allows people to understand your vision, mission, and experience in the industry.
- You can share your personal experience with others.
- You can display all your products/services and transform visitors into paying customers.
- Most importantly, your website will enable users/customers to find you! In that regard, it serves as a powerful marketing channel.
Marketing Strategy
A website not only showcases your products and services, it also helps you market your brand.
So while social media and similar channels can be a good source for new customers, a website will always be the primary element of online marketing.
You don’t own your social media profiles. The social network owns it and you must always play by their rules.
With a website, you get to play by your own rules—with no third-party restrictions, limitations or policies.
A very important point, money-wise and time-wise: invest in something you own.
Now that you know how a website can help you increase audience awareness, build credibility, and market your brand, let’s focus on finding a topic for your website.
Finding your niche
Before you start setting up a domain for your website and getting it online, you need to determine your website’s topic.
1. If you already know your niche go straight to the next step.
2. If you are not sure about the niche, but want to avoid complex stuff, just pick any topic/niche you want and go to the next step. (Recommended)
*You can always change or adapt your niche later. The most important thing now is to get your website online.
Selecting a niche for your website can be tricky, so let’s discuss a few things that can help you find it.
Identify Problems You Can Solve
The first step is to create a list of your top interests (or passions).
Next, analyze your list to find out if you can solve a particular problem related to your interests.
This is important because if you want to create an impact, you need to solve problems.
You can identify problems in a specific niche in the following ways:
- Search for a few keywords in any keyword research tool like SEMrush or KWFinder to uncover some of the most popular terms that are specifically related to user problems (just use your main topic/interest as a seed keyword and see what people are searching for in that space).
- Visit Quora, Reddit, or any other QA website or forum where people discuss the difficulties (pain points) they’re facing in the topic(s) that interest you.
For example:
Let’s say you are interested in “lifestyle” topics.
To find a niche inside the broader topic of “lifestyle”, go to Quora and enter “Lifestyle” in the search box:

Now, click on “Topics” in the left sidebar.

Quora will show you hundreds of niche topics based on the main one.
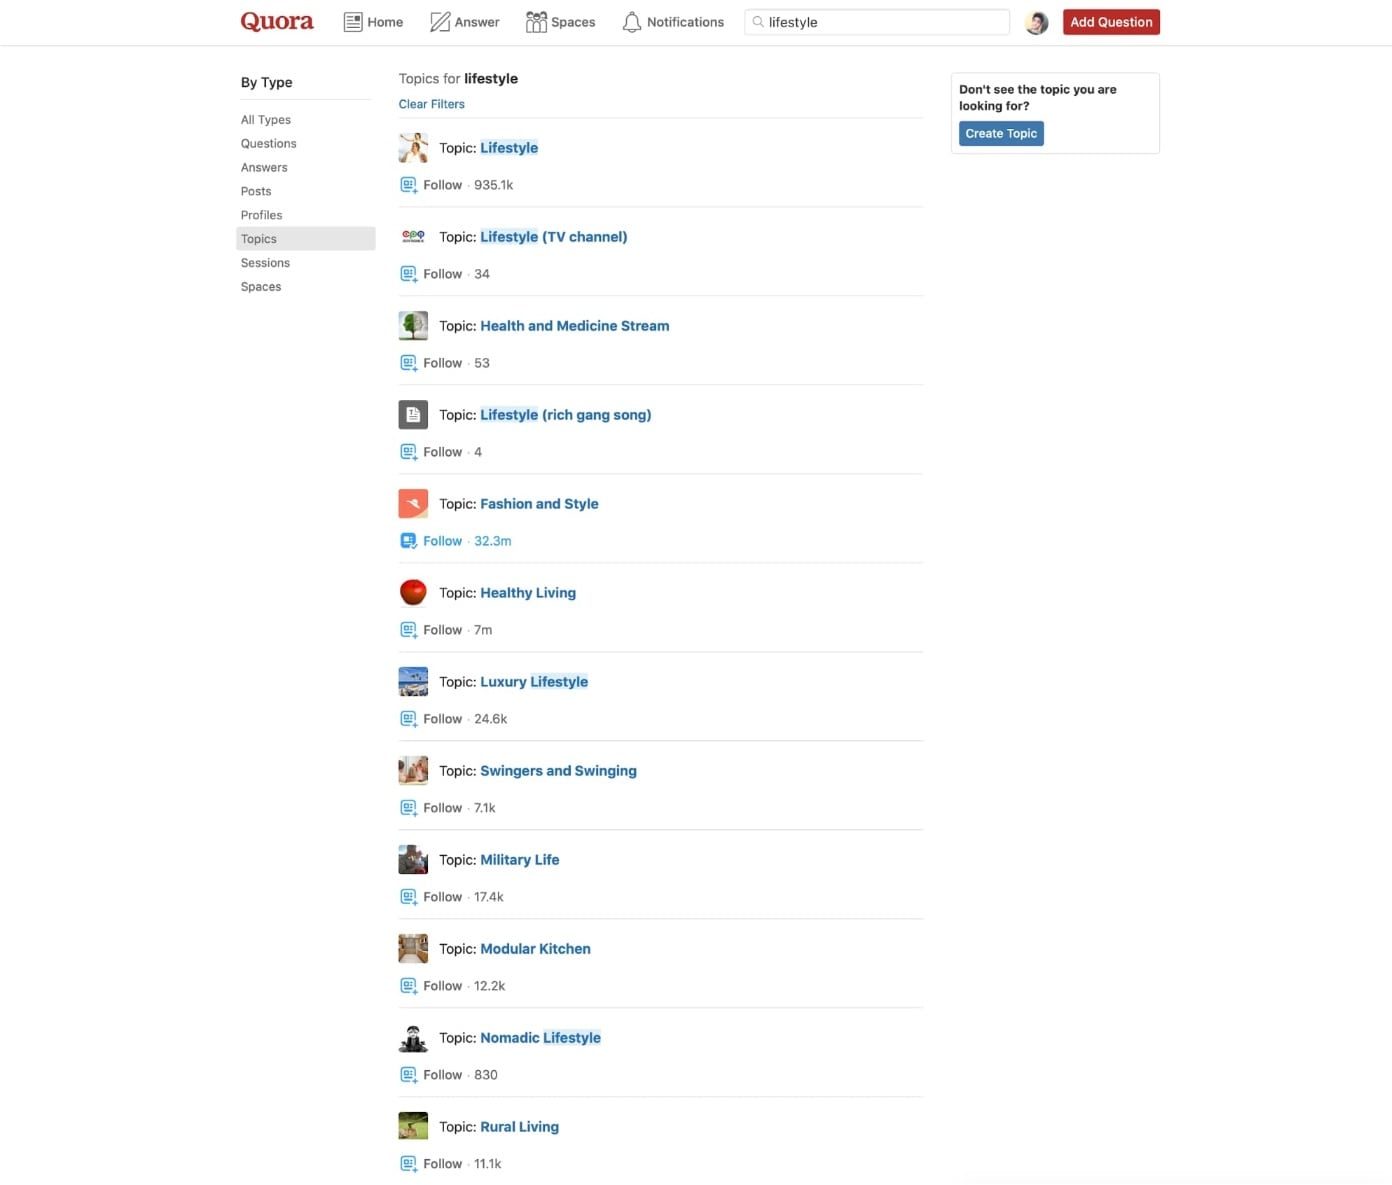
You can go through all the topics and click on the one(s) you like the most.
On topic pages, you will find questions. If you think you know the answers to those questions, or you like a particular topic and get passionate about it – congratulations!
You’ve probably found a perfect topic to build your website around.
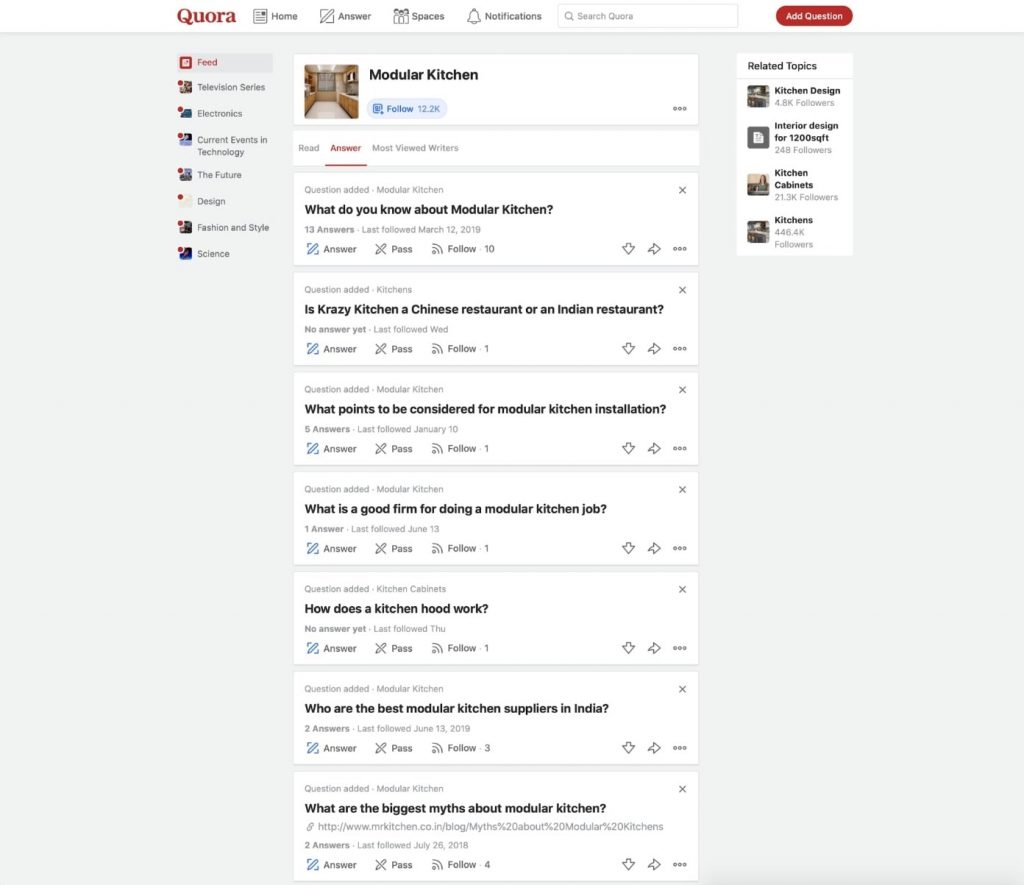
If you’re not sure that’s the topic you want, simply repeat the process and then decide between a few niches.
Once you’ve identified the problem, you’ll need to examine your competition.
Research the Competition
Competitor research is a strategy to identify your major competitors, their marketing techniques, and audiences so that you know what market you are entering and what to expect from it.
To quickly identify your competitors, follow this method:
- Perform a simple Google search with the niche (topic) you have selected
- Make a list of websites on the first few pages of Google results
- Evaluate the relative strength of your competitors (their website traffic, social media engagement, paid ads spending) using online tools like SEMrush (free) or Ahrefs (paid)
After this, you will have a list of your potential competitors and some rough data about them.
Once you have done this research, you should have two possibilities:
- If there’s little to no competition, with clear consumer demand, you can be one of the first to introduce your solution. On the other hand, if you find a good number of companies fighting over a market share for the same product and/or service, it usually means that this particular niche is profitable, but this also means that the niche is competitive.
- No competition and no signs of consumer demand mean that a particular niche is probably not profitable enough. Try to find another one.
For the first point, you will need to analyze whether you can compete with the already established businesses or not, as it’s not worth spending all your resources on something too difficult to achieve in the near future.
Pro tip: A simple strategy to outrank the competition in any industry is to start with a narrow focus and expand as you grow.
Different Types of Websites
After you have decided on a niche, it’s time to understand the different types of websites you can develop based on your idea.
Tip: Narrow down your goals. This will help you find websites in your industry to look at for some inspiration.
Here are a few types of websites you can start:
Blogs
According to Wikipedia, a blog is a discussion or informational website published on the Internet, often in informal, diary-style article entries.
In the last few years, however, blogs have transformed into a very broad concept.
Now, every website publishing informational content can be considered a blog, even when the content is for commercial purposes rather than the author’s personal journal.
Generally, an individual or a small team manages a blog to publish information on specific topics. However, these days the majority of brands (both big and small) use their blogs as a marketing channel, which is termed “business blogging.”
A blog is usually used by businesses to create and establish an effective online presence.
But there are also businesses that are blogs themselves (when a business is built around a blog).
So, a blog is a very flexible concept and it is therefore a good starting point for every aspiring internet entrepreneur. And because blogs are flexible, they can be scaled up or down quite easily.
Although blogs constantly change and evolve, their essence remains simple – a blog is a website (or part of a website) that contains informational content (articles, guides, to-dos, etc.).
For example, Apartment Therapy is a lifestyle blog.

The home page displays the latest blog posts with big, featured images to draw the reader’s attention.

As you can see, all of the posts are somehow related to home and decor, which establishes the website as a useful blog for everything involving the home industry.
eCommerce
Note: eCommerce website SEO is less likely to be hit by disruptions caused by AI compared to other types of websites. So, it’s still a good website idea.
An eCommerce (or electronic commerce) website is an online portal/marketplace where you can sell your products or services to anyone on the Internet.
Big names like Amazon and Walmart dominate this space, but the eCommerce world isn’t exclusively theirs. There’s room for smaller, specialized brands to carve out their niches and thrive.
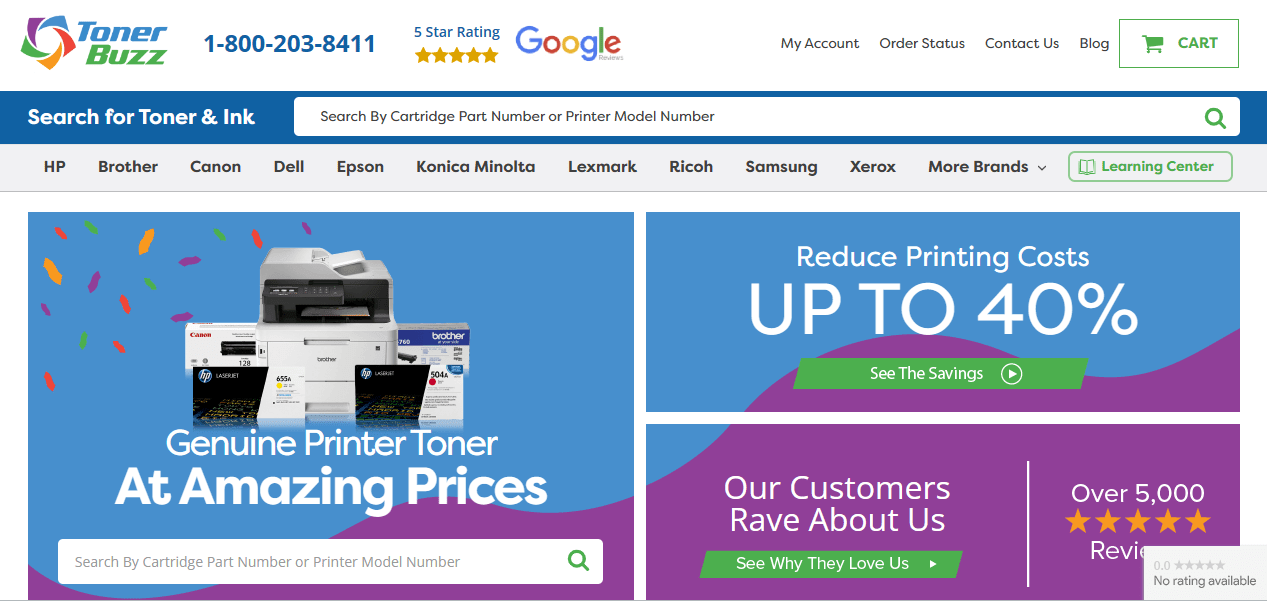
Take Toner Buzz for instance. This is a dedicated toner reseller site that’s significantly smaller than giants like Amazon and Walmart. Yet, Toner Buzz holds its own in the marketplace.
They do so by putting together two important components of a modern-day business:
- easy and effective customer service (thousands of five-star reviews, humans instead of bots, and other things big brands lack)
- better optimized website
For instance, take a look at their product page for the popular HP 414X set. It is arguably the best-optimized page for this product on the internet, offering comprehensive information and an easy shopping experience.
Platforms like Shopify make creating your online store easy, as they handle all the back-end development.
However, our suggestion is to go with WordPress and to take advantage of the WooCommerce plugin, which can turn any website into an online store.
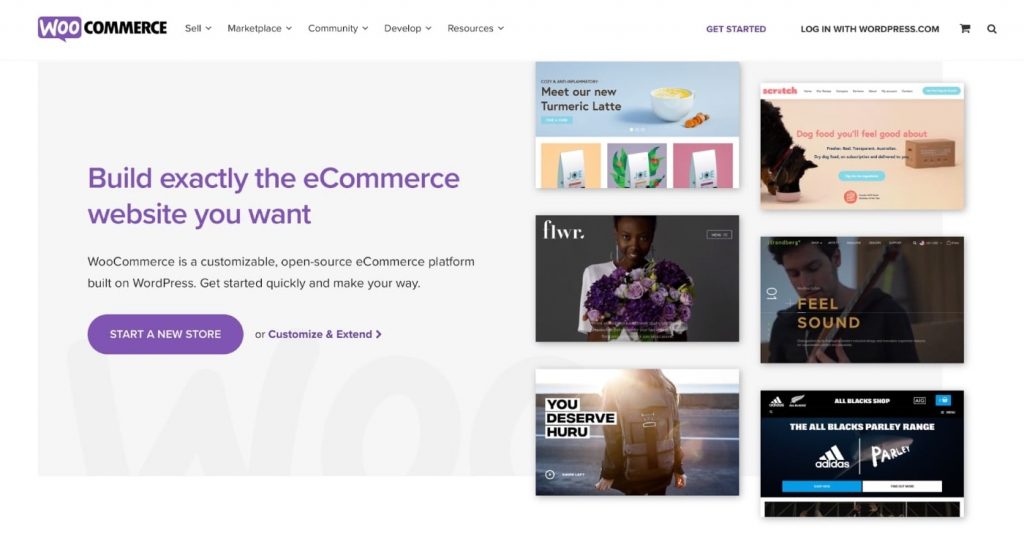
This way, you won’t have to depend on a third-party platform (remember, we spoke about this above?), and you can manage all your products exactly the way you want to, without any restrictions.
In the following sections of this article, we discuss how to go about starting a WordPress website.
Tip: Once you set up your eCommerce website, make sure you have an SSL certificate and that you’re following eCommerce SEO best practices to get organic (free) traffic from search engines such as Google.
Business Site
If you are going to build a website for your existing offline or online business (for example, a salon website for online appointments), then this site type will be perfect for you.
Business sites are simple, static websites that different types of businesses use to promote their products and services.
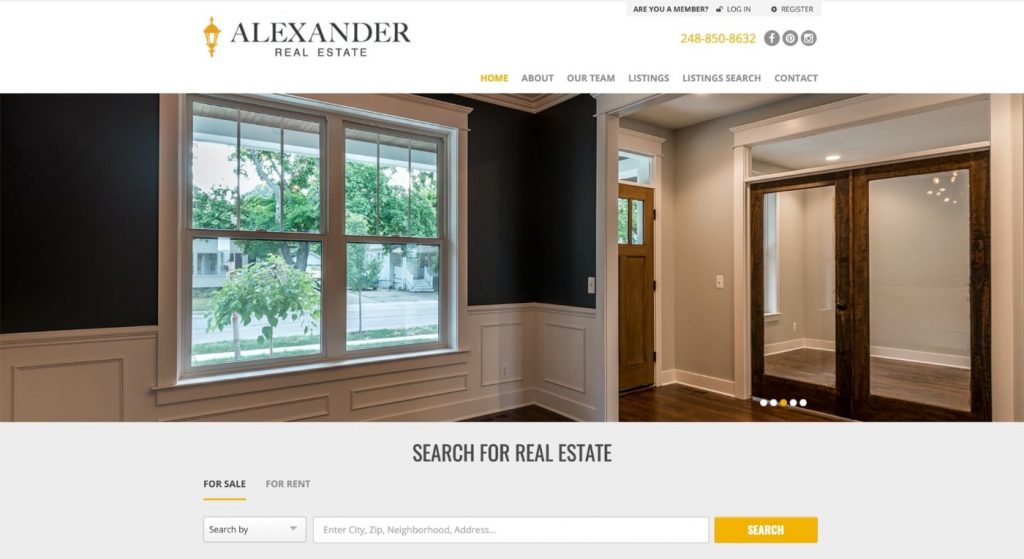
Usually, every business site has a Home, About, Contact, and Service/Product page. These pages are rarely updated, which is why they are called “static” pages.
These websites are great if you need a solution to establish your online presence, but they are not necessarily the best way to sell products directly to consumers as Amazon does, for instance.
Other Website Types
The list of website types is never-ending!
We’ve covered the most common website types to help you start, but a few other website types are:
- Personal
- Educational
- Portfolio
- Entertainment
- Magazine
- Media
- Brochure
- Infopreneur
Choosing the Right Domain Name
A domain name is a website address like Google.com or Siteefy.com. The name will cost you anywhere from $10 to $30 a year, depending on what you choose.
In most cases, you will be able to get a domain name for free with web hosting registration (which we cover in the next section).
For now, follow these tips to select a domain:
- If you want to create a website for your existing business, then the domain should normally be your brand, like yourcompanyname.com.
- If you’re going to set up your personal brand, yourname.com is the perfect option.
- If you want to target your audience worldwide, go for .com, .net, or .org. But if you’re going to target a country-specific audience, use a country-specific domain extension like .co.uk (UK), .fr (France), or other specific ccTLDs.
Here are some additional tips you can use to find the best domain for you:
- Make it relevant: A domain name should indicate what your website is all about
- Make it easy to remember: Choose a short domain, as customers can remember short words more easily
- Avoid numbers: It’s generally a good practice to avoid numbers to keep the domain simple
- Include keywords: If your website is about cars, then try to add the keyword “car” anywhere in the domain
Now, let’s help you decide on the platform where you will be building your website and web hosting where your website will be “living”.
Note: If you are building on WordPress, then in most of the cases you get all three in a bundle: domain, hosting, and WordPress – all in one. No need to buy these things separately.
Why WordPress Is the Best Platform for Creating a Website From Scratch?
When it comes to selecting a website platform, it’s best to go with a content management system (CMS) instead of a web framework (such as AngularJS, Laravel, etc.).
A CMS is a software designed to help non-coders create, manage, and publish content on a website.
So with a CMS, you can handle most of the technical things yourself, without hiring outside help (which means saving tons of time and money).
Currently, WordPress is the best CMS on the market. Let’s learn more about WordPress and see how you can start with it:
WordPress
With a 42% market share , WordPress is currently the most popular CMS in the world.
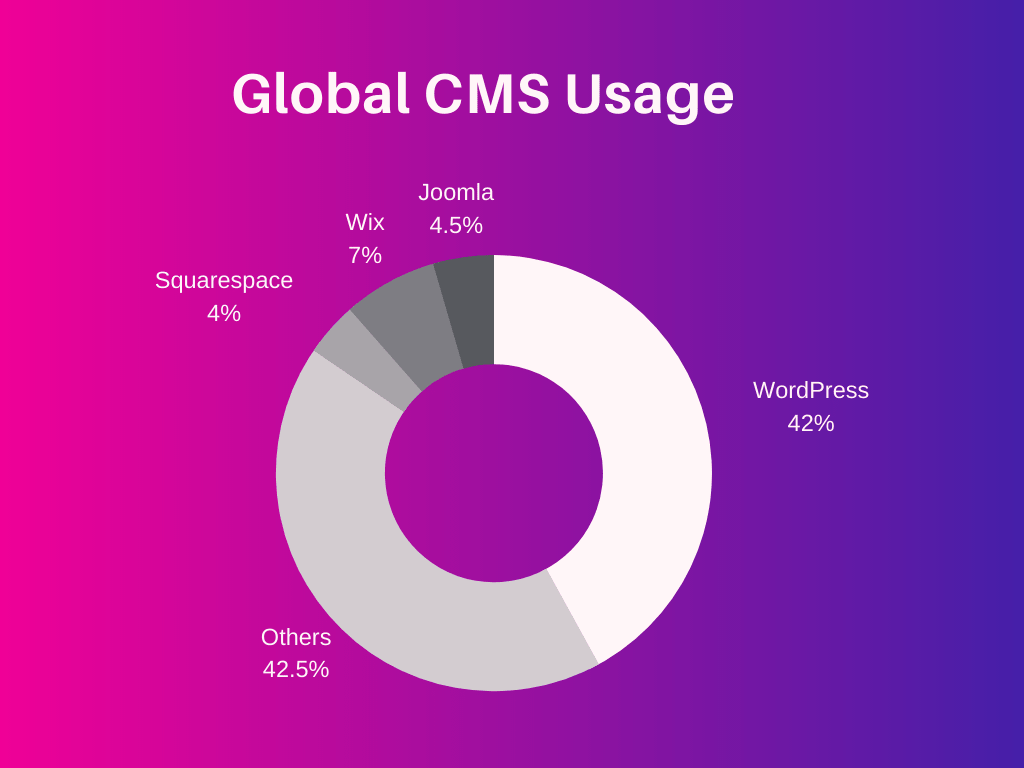
Unlike Wix and Squarespace (website builders), WordPress.org is free to use with a custom domain name.
Note: Don’t confuse WordPress.org (CMS) with WordPress.com. Both are based on WordPress. but they are completely different. WordPress.org is an open-source CMS and is free for anyone to use, while WordPress.com is more like a website builder with certain limitations. When we say WordPress in this guide, we always mean WordPress.org.
With WordPress, you can create a business website, open an online store, sell online courses, run a marketplace …in short, you can build anything you want, even with the most basic skills.
WordPress is a flexible, powerful ecosystem of everything you might need or imagine. It has millions of pre-built themes and plugins available, which you can use to set up pretty much anything you want on your website.
For Example:
If you want to add a contact form, gallery, forum, shopping tool – basically whatever you want, often all you have to do for this in WordPress is to look for a plugin that does this job and install it with on your website a few clicks.
That’s it – a piece of cake!
Some of the most important WordPress features include:
- Full design customization
- SEO-friendliness (this one is particularly important since you might have a hard time ranking on search engines with classic website builders)
- Responsiveness
- High performance and security
- Easy content management
- Huge WordPress community (there is always help when you need it)
Since it is such a popular CMS, you can easily find a WordPress developer (in case you want to outsource) anywhere in the world within your budget.
Put simply, WordPress is a go-to website platform that eliminates most of the pains associated with creating and running a website, making it your best choice for website development.
Now, let’s help you get your hosting for your WordPress website, and then we’ll show you how to launch a WordPress site…
Step 1: Domain Name & Hosting (for WordPress)
The first thing to do when building a website from scratch is to get a domain name and hosting for it.
ⓘ What is a domain name?
In simple words, a domain name is your website’s address (like siteefy.com).
Learn more about domain names here.
ⓘ What is web hosting?
Web hosting is the place (on a server) where your website is stored and from where it is being served to your website visitors.
Picking the right hosting provider from the outset is super important. Your hosting means your website’s speed, security, uptime, SEO, and overall performance.
Wrong hosting is a nightmare. We’ve been there. We know it.
Avoid.
Several hosting providers are out there, but choosing the best one can be complicated, as there are many factors to consider.
To keep it simple (and avoid all possible frustration), you can start with what WordPress officially recommends.
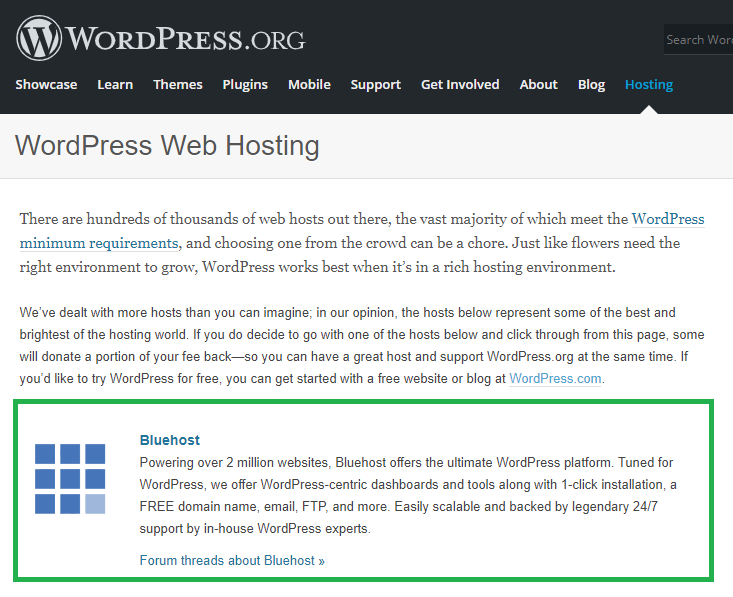
And the first one on the list of WordPress official recommendations is Bluehost.
Here is the screenshot from WordPress.org about this:
🔵 Pro tip: Yes, WordPress officially recommends Bluehost – this is a fact. But we also would recommend considering Siteground and Cloudways.
We’ve had a positive experience with both hosting companies and consider these two to be the best options for beginners.
Setting up a WordPress website with Bluehost is super simple.
Here is what you need to do:
1. Go to Bluehost > WordPress Hosting

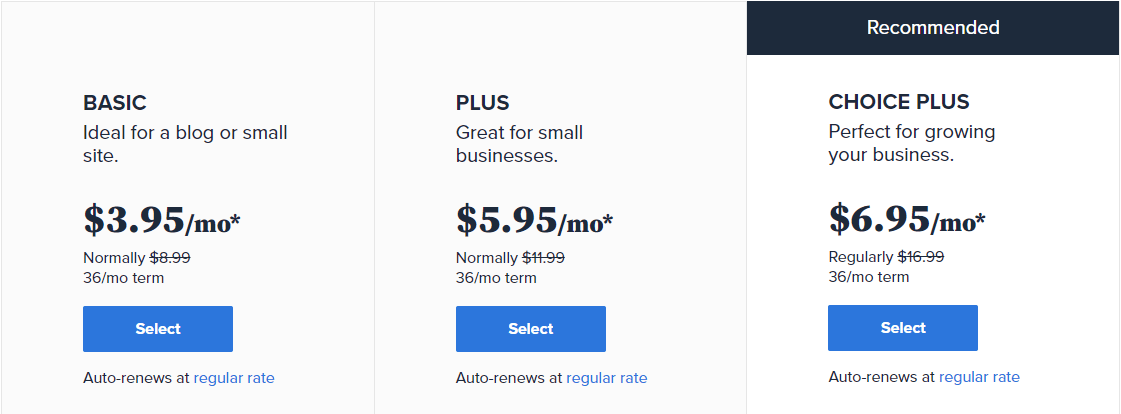
2. Then select plan for your new WordPress website (you can start with any plan you like, it does not matter that much at this stage):
3. Next select your new website domain (or use your own if you have one) and complete the sign up process:
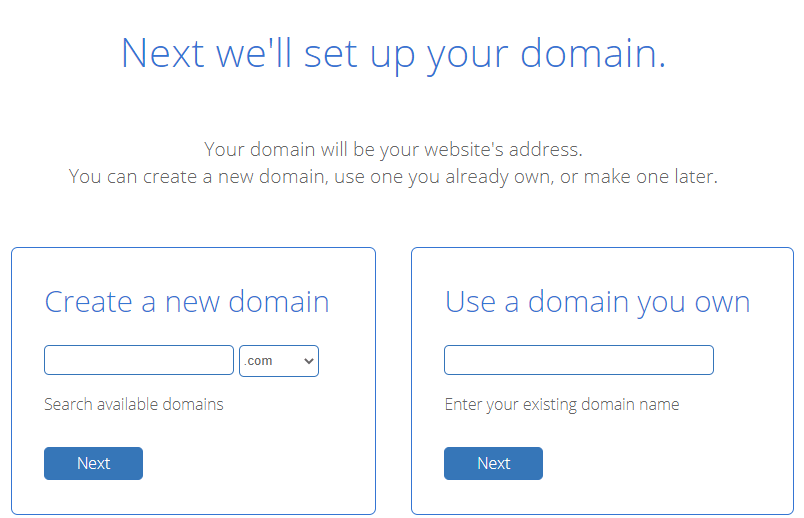
You can also check if your desired domain name is available right here (it all starts with a domain name!):
4. After you complete the sign-up process, Bluehost will take you through a step-by-step process for installing WordPress and making your website live.
5. That’s it. After going through those simple 4 steps you should now have your very own WordPress website live on the Internet!
Step 2: Design & Customizations
Installing WordPress Theme
In WordPress, themes control the design and layout of the website.
WordPress has thousands of free and paid themes available in the WordPress.org Theme Directory.
Usually, paid themes are better, with advanced features, regular updates, and active support. Some paid themes, like Divi, come with a highly advanced page builder, which transforms the whole WordPress experience.
We advise you to go with a premium WordPress theme, as it will save you a lot of time and resources in the long run. If you are a beginner, Divi is an excellent option to start with (go to the Divi section).
🔥 Check out our fresh 2022 Divi Review ➡️
But if you’re tight on budget, you can start with a free theme and move to a paid one later. For example, you can use our Siteefy WordPress Theme absolutely for free.
💡 Tip: To understand WordPress themes better, consider them as the structure of the website on which you can build everything else.
Themes are responsible for all the front-end styling of a WordPress website (similar to a theme on your smartphone).
Everything that a visitor can see on your website will be controlled by the theme.
To install a theme, navigate to Appearance > Theme, and then click on the “Add New Theme” box.
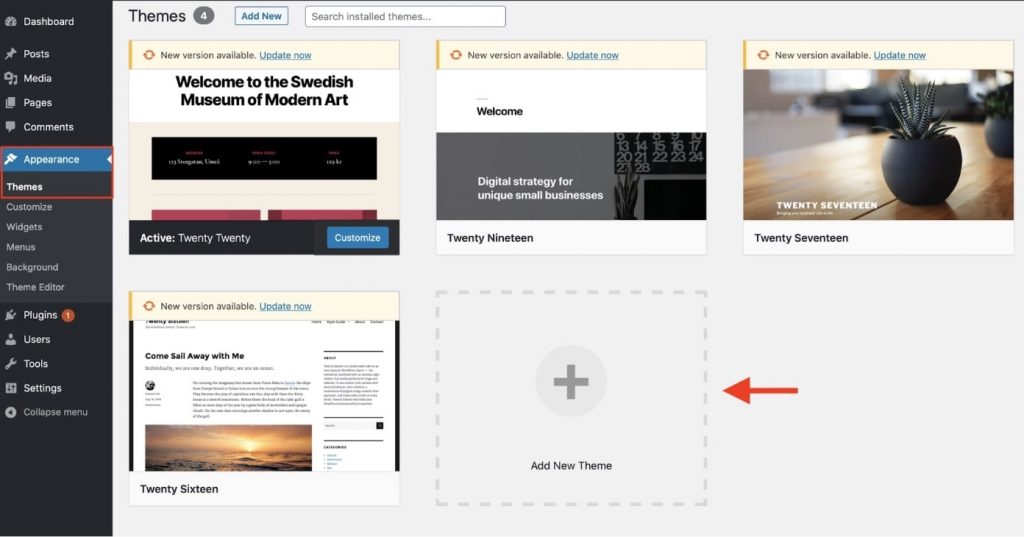
Here, you can sort the theme library based on featured, popular, latest, and favorites.
You can even filter themes based on their layouts.
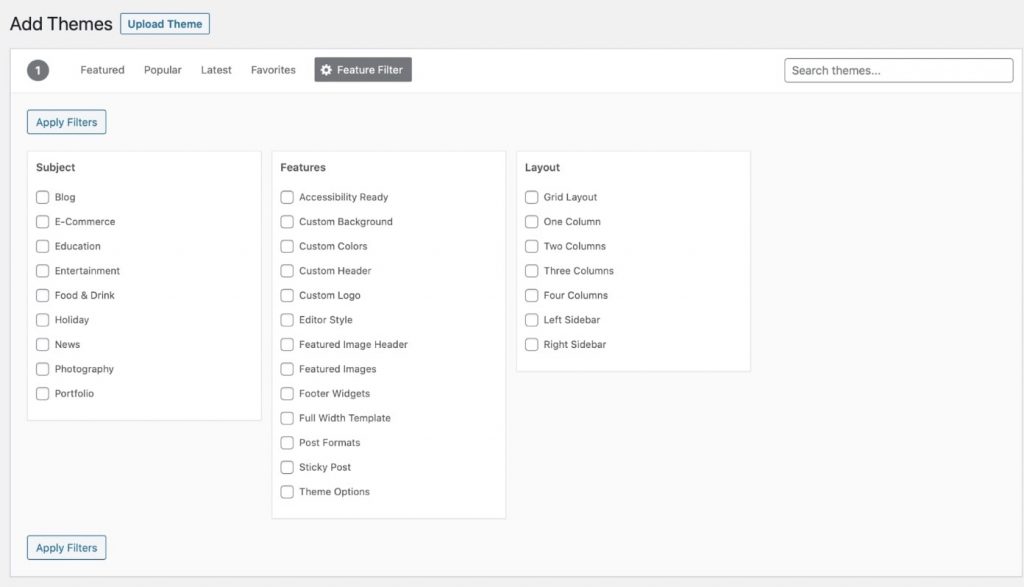
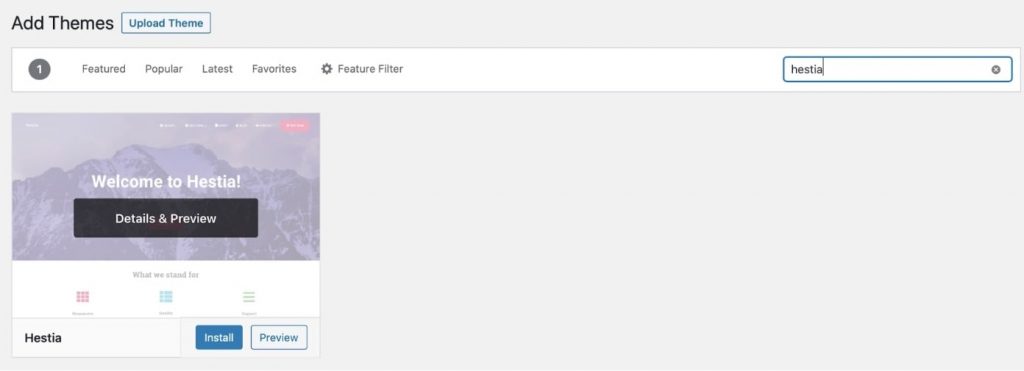
If you already know the theme you want to install, you can enter the name directly in the search box located at the top right corner.
When you see your theme listed, hover over to the theme and then click “Install” and “Activate.”
To customize the theme, you can go to Appearance > Customize.
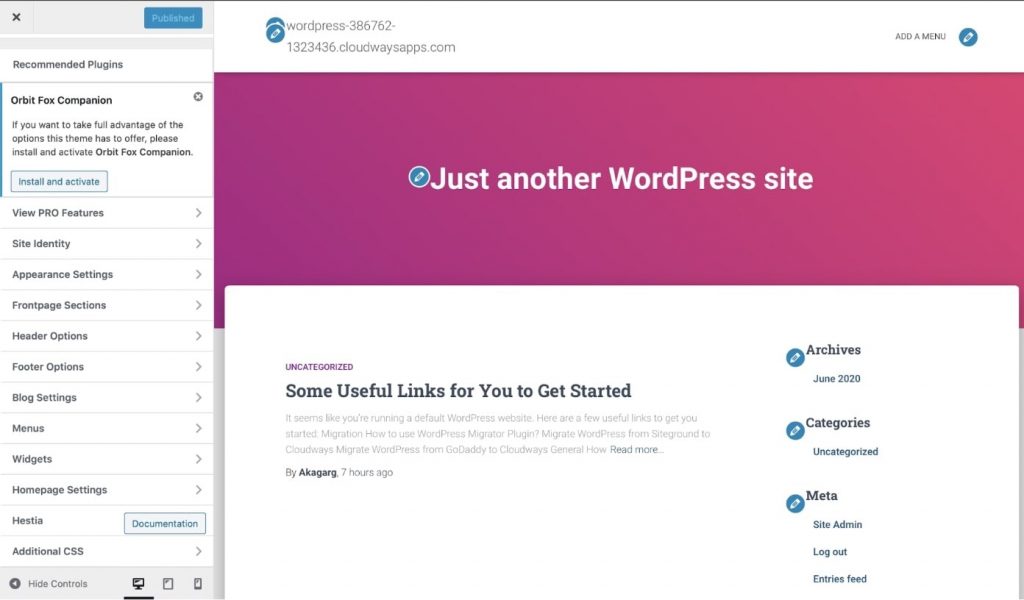
From the left sidebar, you can customize all the theme features such as the menu, header, footer, homepage settings, typography, and colors.
📝 Note: Some premium WordPress themes like Divi and even free themes like Siteefy might not be available in the Theme Directory.
These themes can be downloaded from their respective websites and then manually uploaded to WordPress.
This is how to upload themes that are not available in the WordPress repository:
Install Essential Plugins
In WordPress, a plugin is an external solution that adds additional features and functionality to your WordPress website.
For example, if you want to build a contact form, you can install a contact form plugin like JetFormBuilder, and then you can create your contact form in a few clicks.
Plugins are designed to extend the core functionality of a WordPress website.
Like themes, thousands of plugins are available to download for free.
You’ll find a plugin for almost everything from SEO to image compression, forms, payment gateways, and forums in the WordPress plugins directory.
📝 Note: A plugin is a file written in the PHP programming language which can be uploaded to WordPress websites. Plugins give the modular approach to WordPress where you can start with a theme, and then install plugins for specific use cases. You can use plugins for everything — from small tweaks to significant modifications.
To add a plugin, go to Plugins > Add New and search for the plugin you want to install.
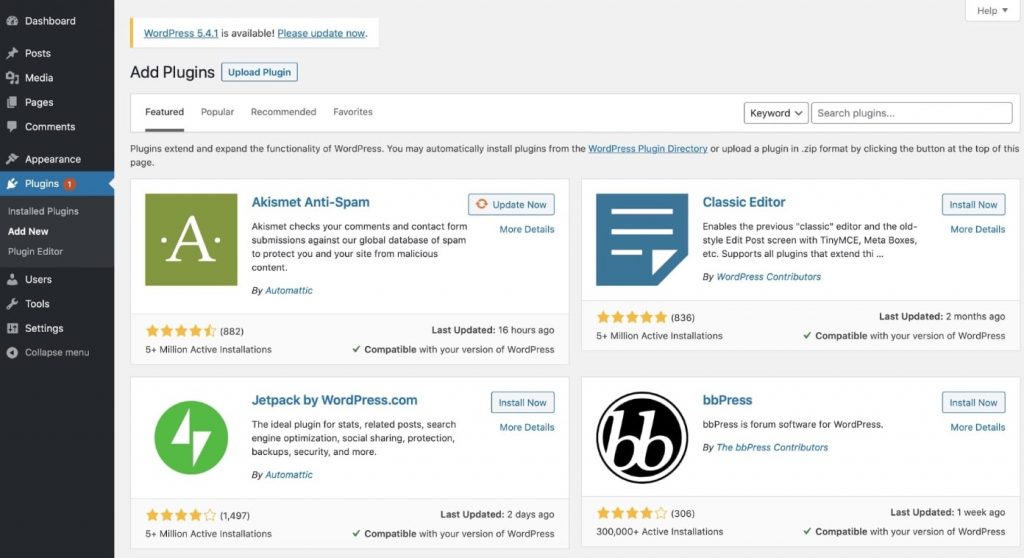
Here are some of the best, most popular free plugins:
- Yoast SEO: Yoast helps you maintain the on-page and technical SEO of your site.
- WPForms: WPFOrms is a drag-and-drop builder that lets you create interactive contact, feedback, subscription, and payment forms.
- Akismet: This plugin often comes preinstalled. It filters spam comments and contact form submissions.
- Google Analytics for WordPress: This is a plugin designed to integrate Google Analytics for traffic data.
- UpdraftPlus: UpdraftPlus lets you take the backup of your site directly to Dropbox, Google Drive, and Amazon S3.
Create Pages
After the design setup, you can start with the content and create the necessary pages.
To add a page, navigate to Pages > Add New.
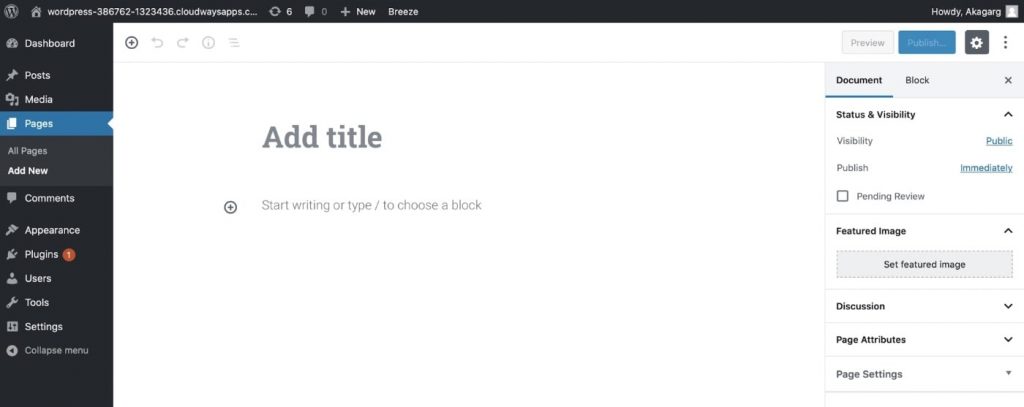
Here, you can change the page layout and add title, featured image, set categories, and tags.
To add a block on a page, click on the plus symbol button, and it will give you a dropdown list of options such as widgets, layout elements, etc.
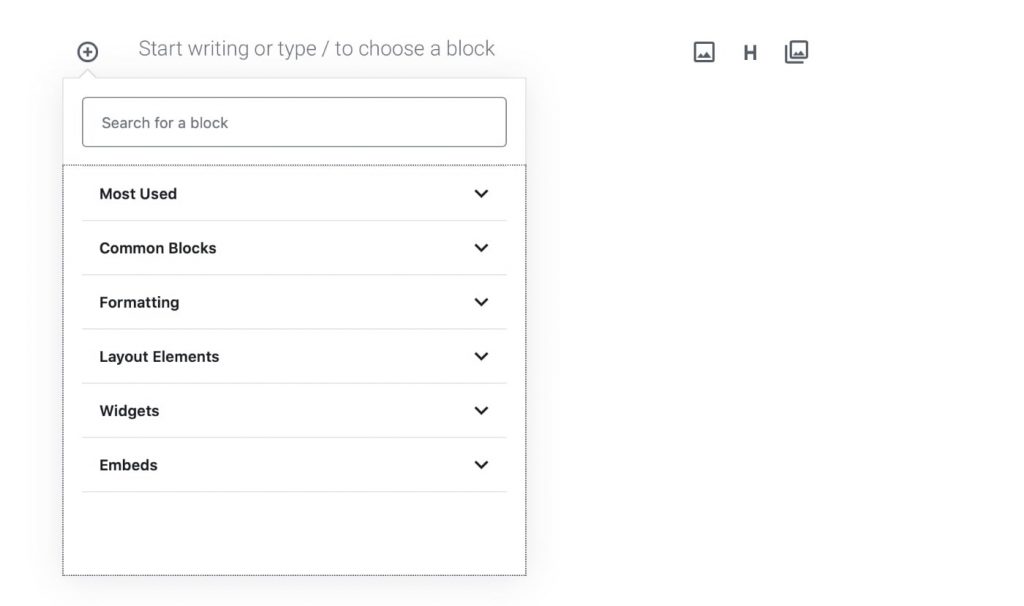
For example, if you want to add a paragraph on your page, select “Most used” and choose “Paragraph,” and it will be added on the page.
Regardless of your business, some pages should be present on every site, such as:
- Homepage: The most important page of a website, where you showcase your business USP to visitors.
- About: This page helps people understand what your website (or business) is all about.
- Products/Services: These pages help users learn about your offerings and how to purchase them.
- Contact: This page displays details like your phone number, email, and address. You can also place a contact form here, through which people can reach you directly.
- Blog: This page showcases all your blog posts.
Set Up Navigation Menu
Navigation helps visitors to go from one page to another. It is usually placed at the top of every website.
To set it up for navigation, go to Appearance > Menus.
Then give a name to your menu (it’s useful to have more than one menu on your site) and click on “Create Menu.”
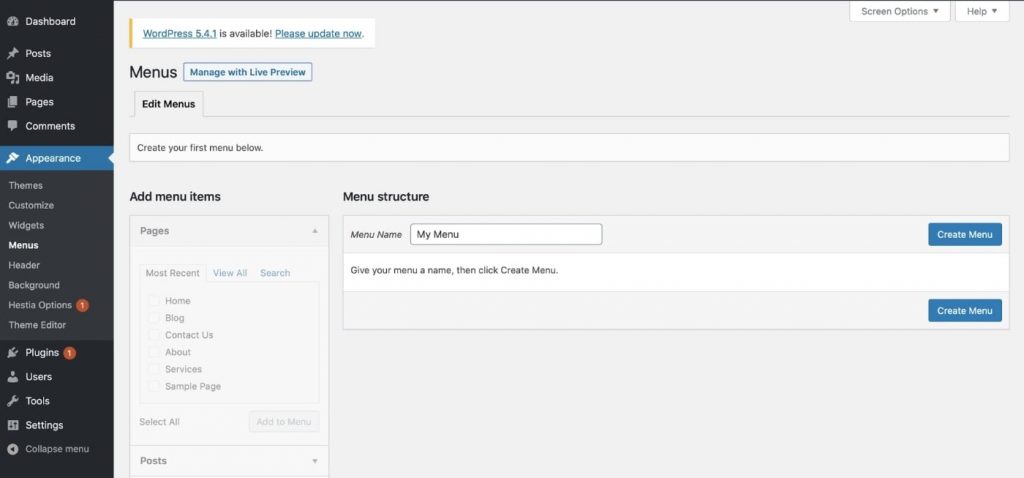
Now, you’ll be able to add or remove pages in the menu.
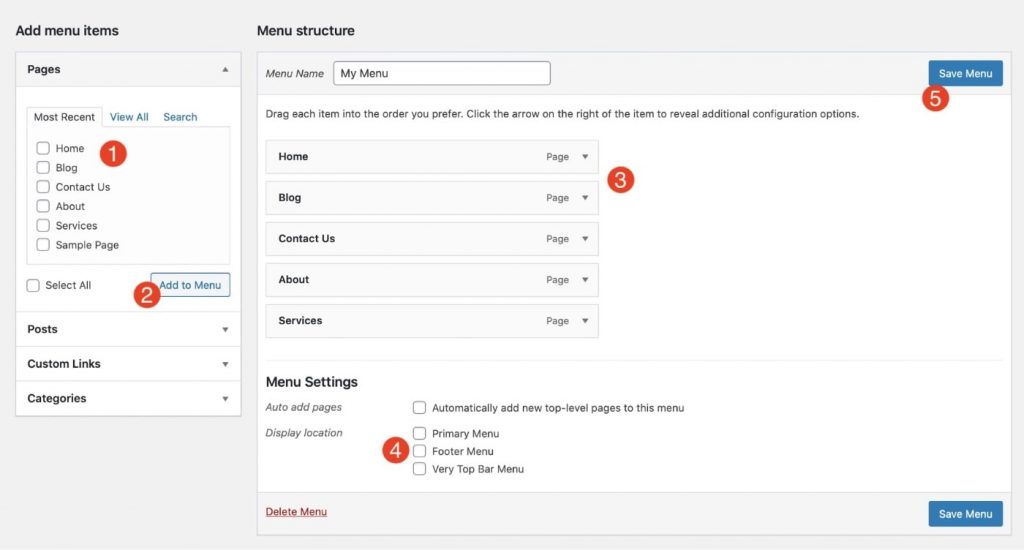
- Select the pages, posts, custom links, or categories you want to add.
- Click on “Add to Menu” to add the selected pages.
- Drag and drop the pages to arrange the structure.
- Select the location where you want to display the menu.
- Click “Save Menu.”
Finally, go to your website homepage and check whether the menu is correctly displayed.
If you are looking for advanced WordPress design, external WordPress Visual Editors can help you with this task.
See some of the best editors you can use for your new WordPress website by opening the section below ↓
Designing WordPress Website with Drag & Drop Page Builders
WordPress drag & drop builders help you build and design your WordPress website without touching a single line of code.
Most advanced WordPress drag & drop builders are based on the What You See Is What You Get (WYSIWYG) concept and are therefore very easy to use. These tools are specifically designed for non-coders to create a beautiful website using drag & drop content elements.
In other words, WYSIWYG builders turn WordPress into an intuitive website builder (just like Wix or Squarespace).
Page builders include pre-built pages (simple website templates for beginners) and full website kits, so with just a few clicks, you can import the template and then edit the content.
This function is a game-changer in the website industry, as with WordPress + Page Builders, you get ultimate platform freedom and full design flexibility. You don’t have to code anything, and you can set up a professional website in no time.
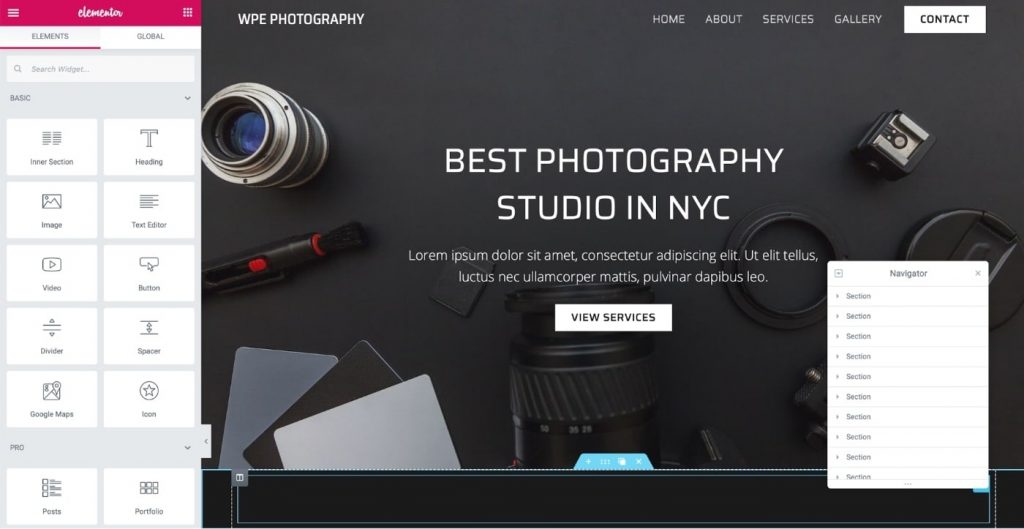
The basic structure of your site should be ready if you have followed all the steps in this guide.
Now, let’s look at some important page builders and see how you can use them to set up an amazing website within minutes.
Important Note: If you decided to use a drag & drop builder for WordPress, then it’s better to use the builder from the very beginning, as some builders may override the changes you might have made as described above.
Elementor
Elementor is one of the most popular WordPress page builders, with over 5 million installs, and it is built for professionals, from freelancers to business owners, bloggers, and agencies.
It is available as a free plugin with limited features. For full access, you can subscribe to Elementor Pro, which will give you access to hundreds of content elements.
Some of Elementor’s features are:
- 100% drag-and-drop editor
- 300+ page templates
- 90+ content widgets
- Popup builder
- Theme and eCommerce builder
- Full site editing
- Animations and gradients
- Translation-ready editor
The best thing about Elementor is that it is fully capable of creating a website from scratch (like one page website, portfolio website, news website, business websites, etc.). You can create posts, pages, themes, and even an eCommerce store without even installing other plugins for landing pages, popups, contact forms, coming soon, and maintenance pages.
Go to the official Elementor website or check out this video to get a quick overview of Elementor:
To set up a WordPress website with Elementor, follow these steps:
- In your WordPress dashboard, go to Plugins and search for “Elementor.” Click on “install” and activate the plugin.

- Then go to any post or page and click on the “Edit with Elementor” button.

- Now, you can start building your page with the content widgets in the left sidebar. If you want to import pre-built templates rather than creating them from scratch, click on the button next to the plus icon.
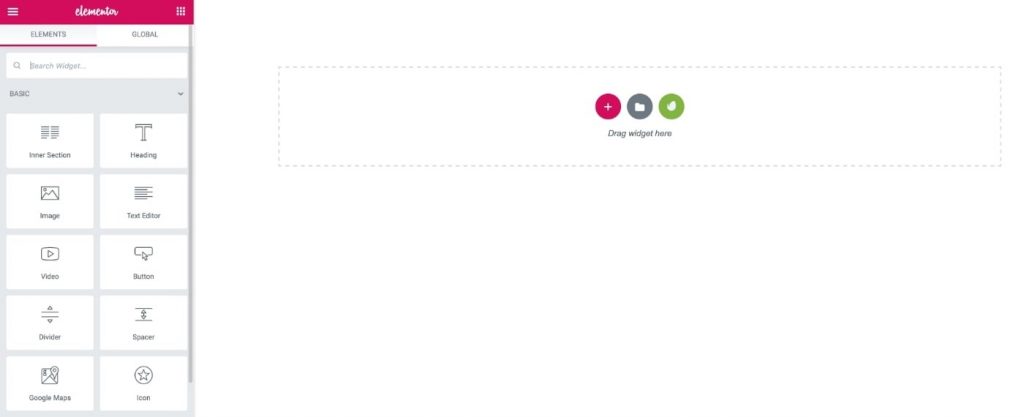
- At that point, the Elementor template library will open up, and you can import any template of your choice.
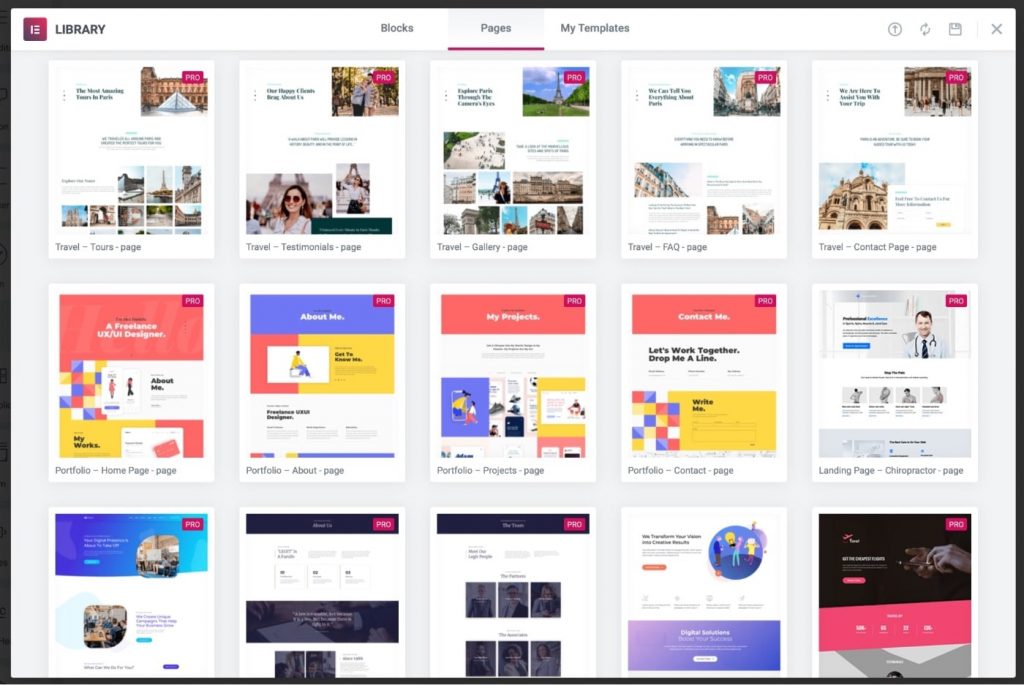
- After you have selected the template, hover over it and click “Insert.” That’s it! Your page is now ready.

Note: To import premium templates, you have to purchase Elementor Pro (it’s worth it!).
You can repeat the same process to set up all the other pages, such as contact, services, projects, galleries, etc.
Beaver Builder
This is another WordPress page builder that focuses on simplicity and robust structure. It comes with a full drag-and-drop editor with live frontend editing.
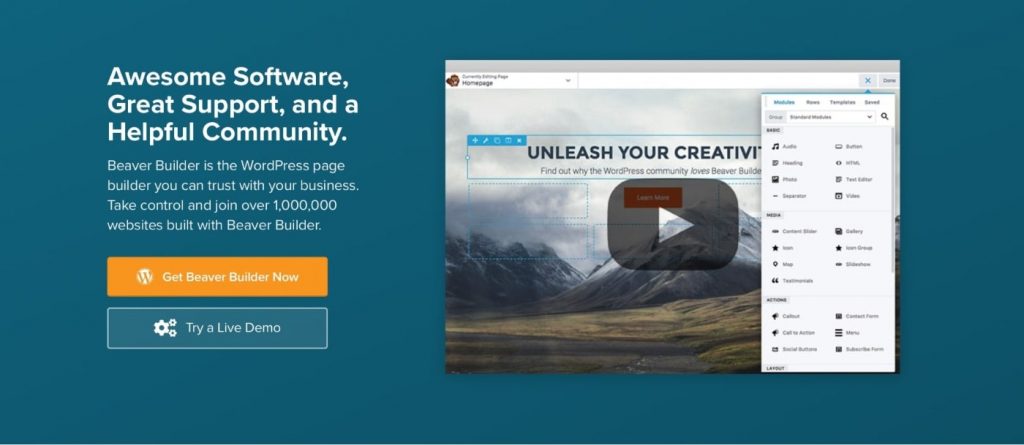
You can use Beaver Builder to take full control of your website and design aspects like global styles, posts/pages, archive pages, or a WooCommerce store. Similar to Elementor, this plugin has both free and paid versions and a demo available to try on their website.
This page builder is packed with many gorgeous templates to help you get started. You can even save your own designs as templates to reuse all over your site or export them to use on any other site.
Some of the Beaver Builder features are:
- Responsive editing
- SEO optimization
- WooCommerce support
- Multi-site capabilities
- Reusable templates
- Translation ready
- Theme framework
- Works with all themes
Check out this video to get an overview of how Beaver Builder works:
With a price tag of $99, Beaver Builder is priced a bit higher than Elementor (which starts at $49). However, you can install Beaver Builder on unlimited websites, whereas Elementor’s $49 plan only gives you access to one website license.
Beaver Builder also comes with a 30-day, no questions asked, refund policy, so you are covered fully if for any reason Beaver Builder doesn’t work for you.
Divi Builder
Divi Builder, by Elegant Themes, is a premium page builder for WordPress.
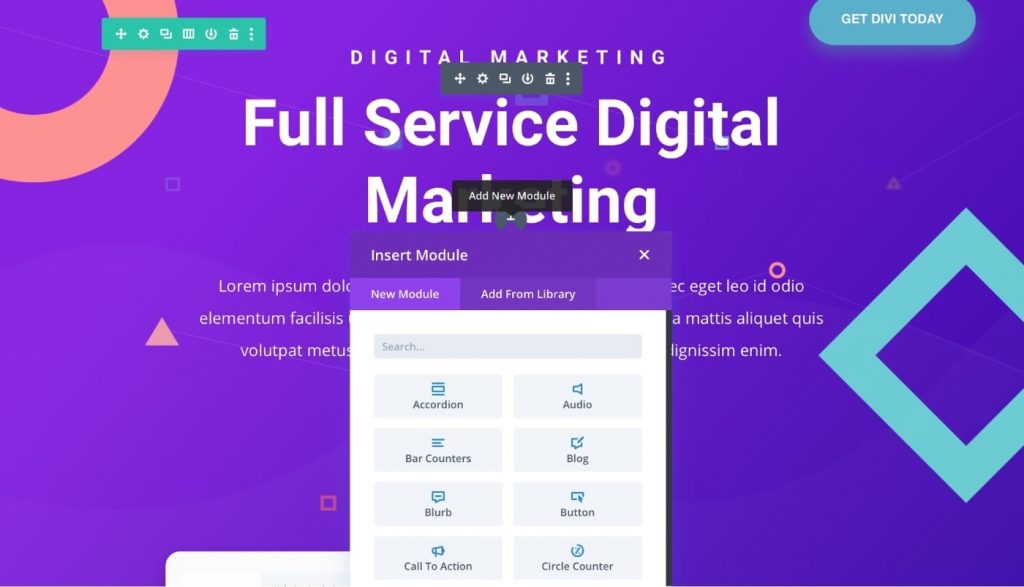
Unlike Elementor and Beaver Builder, Divi offers two types of editing: backend and frontend. This flexibility means that you can either build your pages in the live editor or use the backend interface to create your pages using module blocks.
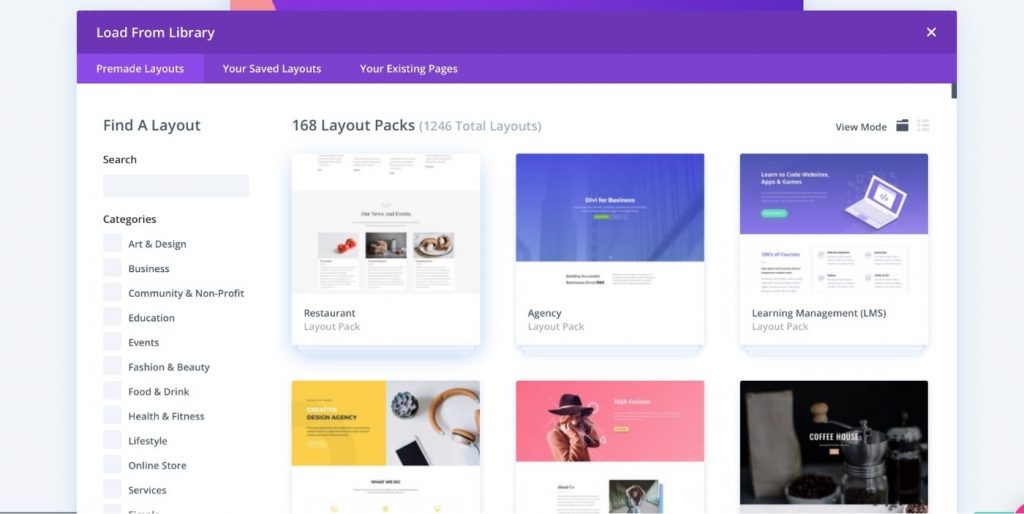
Divi’s template library is huge, with over 800 pre-made designs and 100+ full website packs. All the Divi designs look amazing, and you can find a template for almost any industry, such as beauty, health, events, technology, business, eCommerce, photography, and more.
Some of Divi Builder’s other features are:
- True visual editing
- Thousands of design options
- Responsive editing
- Multi-select and Bulk editing
- Pricing tables
- Contact forms
- WooCommerce builder
- Built-in A/B split testing
As for the pricing, there’s no individual plan for Divi; it is bundled with all the other Elegant Themes products (such as Bloom and Monarch) at $89 per year (unlimited websites and premium support included). You can select the lifetime plan at $249 if you don’t like the yearly payments.
In the bundle, you will get access to Divi theme, Divi page builder, Extra theme, Bloom popup builder, and Monarch social media plugin.
Go to the official Divi website or check out this video below to learn more about Divi Builder:
Building a Website From Scratch using Website Builders (Wix, Squarespace and others)
Website builders are another tools that allow you to design and build websites without any coding.
These builders are similar to the WordPress page builders that we discussed in the last topic. The difference is that with website builders you don’t need separate hosting, themes, or plugins — all of that is usually baked right into the website builder.
So if you’re looking for an easier solution and you don’t want to manage multiple moving parts (as with WordPress), website builders might be good option for you.
Note: Keep in mind that website builders may have certain limitations, as you’re building your website on someone else’s platform. So, if you want to scale and grow your new website – go with WordPress.
Generally, website builders are good for smaller projects which do not plan to heavily rely on SEO in terms of traffic.
Let’s see what website builders we have available:
WIX
Over the last few years, Wix has become a super popular website builder.
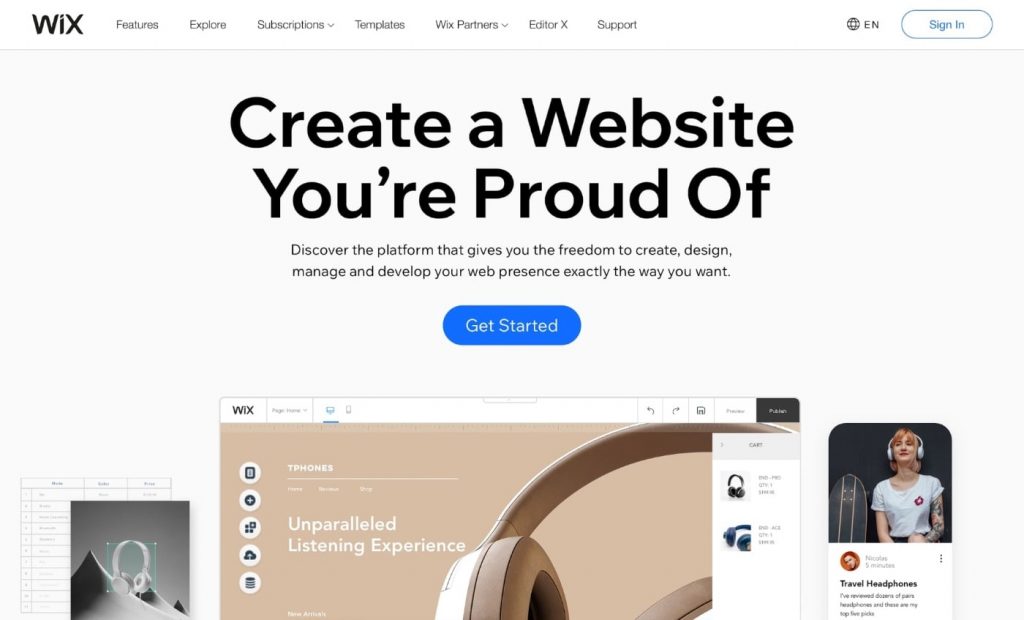
It offers a 100% drag-and-drop editor, which lets you create a professional website quickly.
You can add contact forms, images, videos, maps, and more, simply by dragging the element onto the website.
Like WordPress, Wix offers thousands of professional templates to customize your website any way you want.
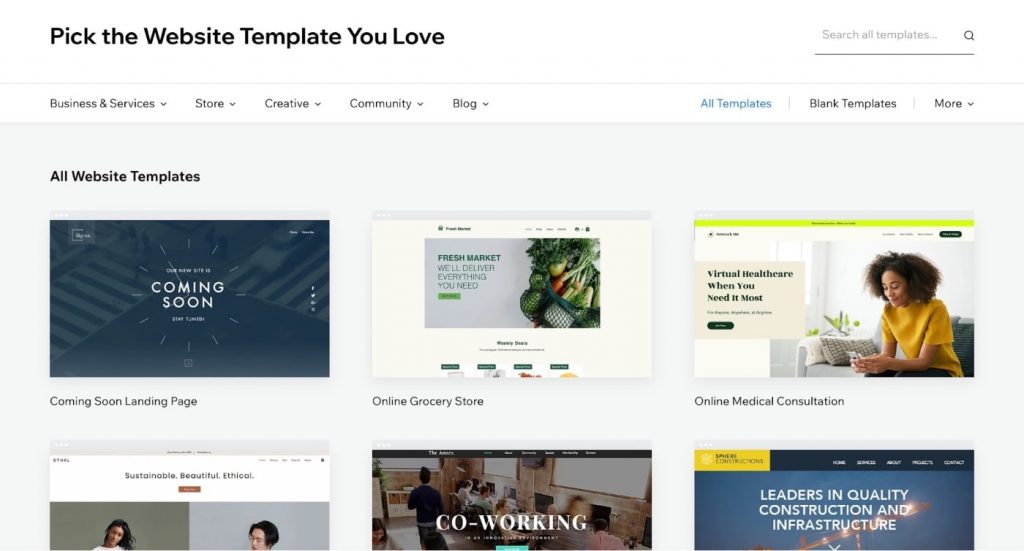
Wix has already categorized its templates into categories such as business, blogging, photography, fashion, restaurants, health, travel, and tourism, so you can find a nice design in almost every industry.
Note: There’s one downside: once your site is published, you won’t be able to switch between templates. If you do switch, you’ll lose all your content and customization, so make sure you have a backup before going ahead with this.
Set Up Website with WIX Website Builder
WIX offers both free and paid plans, but the free plan is enough for this walk-through.
Once you’ve successfully signed up on WIX, select the type of website you want to create.
Wix offers various templates for topics:
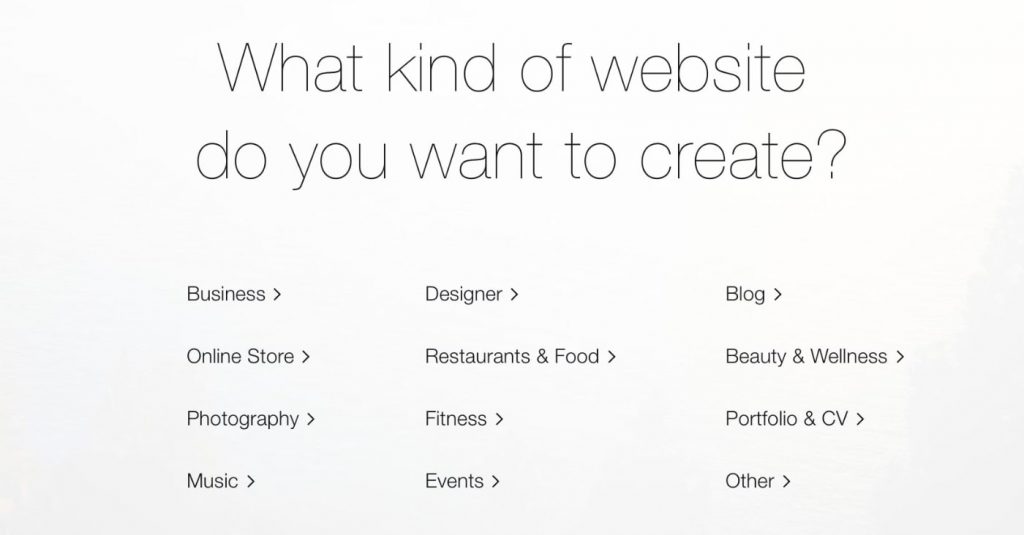
If you don’t find your category, select “Other.”
The WIX onboarding process is divided into two parts:
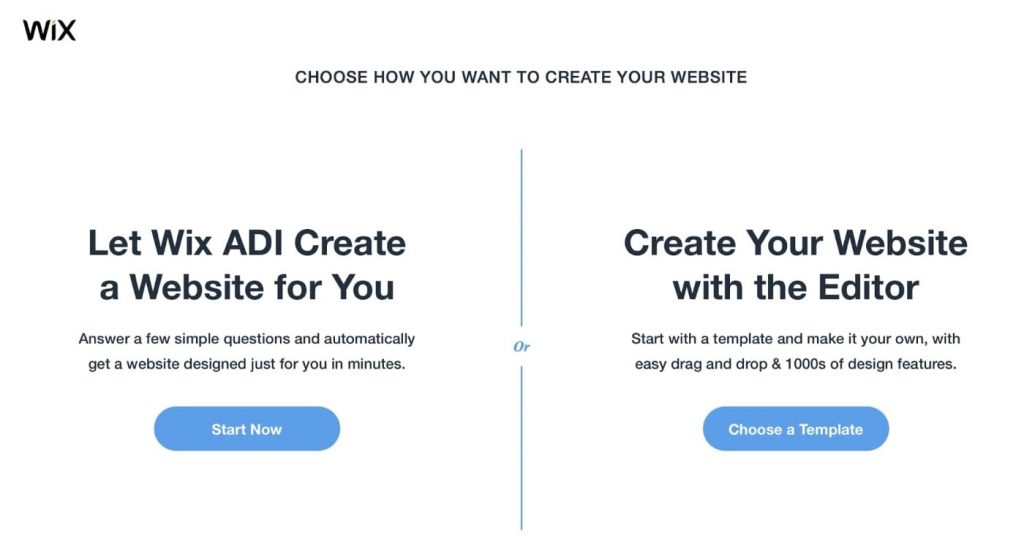
- Let Wix’s Artificial Design Intelligence (ADI) create your website. You’ll just have to answer a few questions, and Wix will automatically build your site in a few short minutes.
- Create your website on your own, using the drag-and-drop editor.
The first option sounds good, but it is best to go with the second one for full control of what you display on your site.
Tip: Select a template that has all the things you need, as you cannot switch between templates later.
Customize your Template
The WIX editor is reasonably flexible when it comes to design customizations.
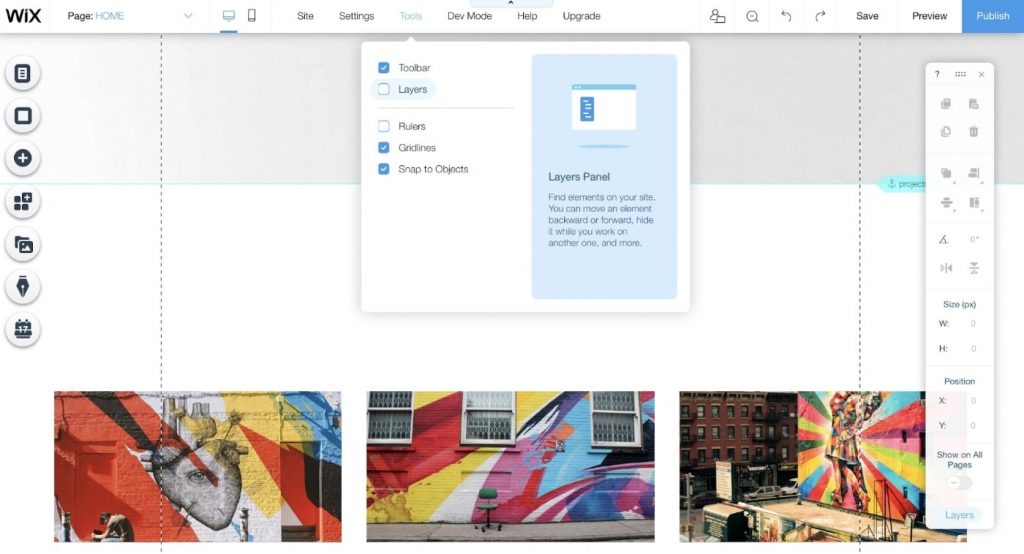
Some of the available options are:
- Add new page
- Change the color theme
- Select different fonts and colors
- Add new elements, like contact forms, sliders, etc.
- Introduce transitions
- And more!
After customizing your template, you can add content on the Home, About, Product, and Contact pages.
Preview Your Website
With the preview, you can see all of the modifications you have made before you go live.
It’s important to check whether everything is in place, such as:
- Are all the buttons working and navigating to the appropriate page?
- Are your content’s spelling and grammar correct?
- Is the website mobile-friendly?
- Is the contact form working correctly?
Make sure you check everything to avoid publishing an unfinished site.
Publish Your Site
If you’re ready to publish your site, click on “Publish.”
WIX will then ask you to either go with a free wix.com subdomain or connect your own.
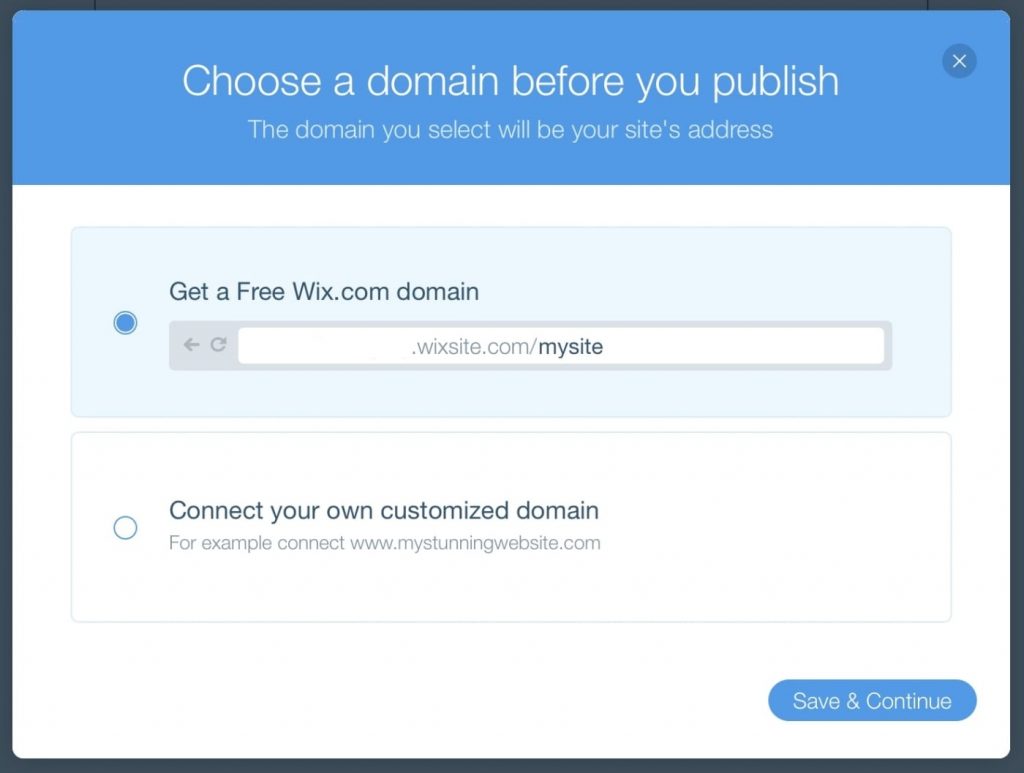
If you want to connect your domain, you’ll need to upgrade your Wix account (if you’re using their free trial).
Squarespace
Squarespace is a website builder known for its stunning templates and customizations. It is similar to Wix, in that it lets you create a website without any particular technical knowledge.

Similar to Wix, Squarespace also provides multiple templates for almost all popular industries.
Though Squarespace has only 50+ templates, compared to the hundreds that Wix has, they are focused on quality rather than quantity.
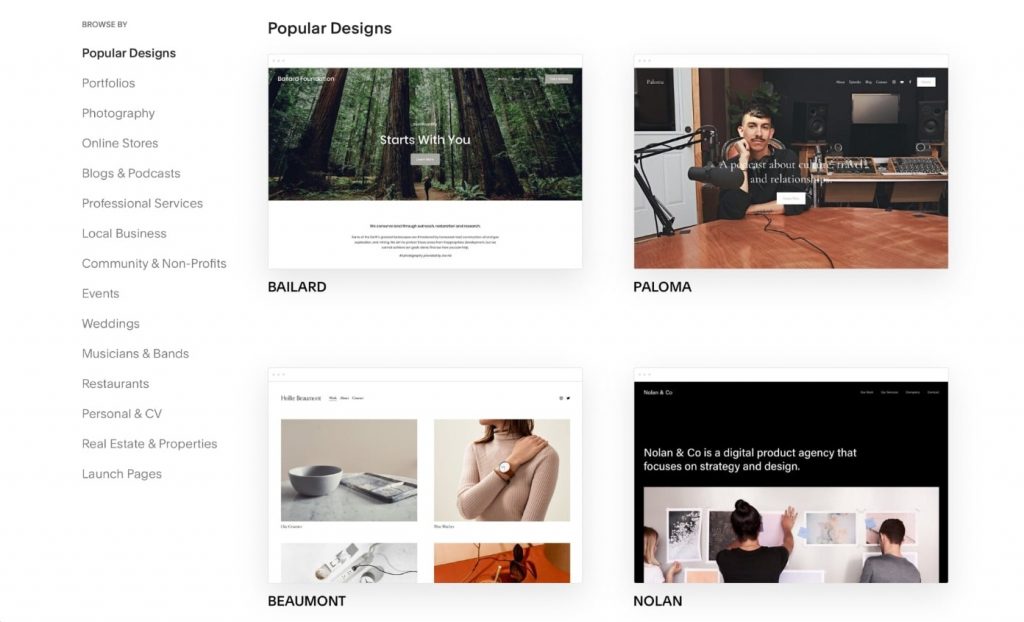
If you’re a beginner, you may find Squarespace difficult to use, as it’s somewhat advanced compared to WIX and other website builders.
But Squarespace offers a mobile app (Play Store and App Store), with which you can edit your website from your smartphone. So if you’re looking to edit on multiple devices, this is the best solution for you.
Note: Squarespace only offers a 14-day free trial and no free subscription plan.
Other Options
You can use other website builders as well, such as Weebly, Shopify, BigCommerce, Webnode, etc. if you are looking for specific features.
Step 3: Adding Must-Have Website Features
Building a website is just a start.
To get ahead of your competition and establish your online presence, you will need to optimize your website and focus on essential elements such as speed, user experience, and quality content!
So let’s have a look at some of the features on which you can easily work.
Sitemap
Suppose you publish a blog post on your site, but because your site is new, search engines have difficulty finding it.
That’s where sitemap comes into the picture.
The sitemap acts as a website roadmap, which helps search engines (Google) crawl and index all of your site’s content.
To create a sitemap, you can use the Yoast SEO plugin (if you’re using a WordPress site).

Whenever you add a blog or any other web page, Yoast will update your XML sitemap automatically.
Optimized Page Speed
Page speed is the total time a website takes to load, and it depends on multiple factors, such as hosting server, page size, and images.
If your website takes more than three seconds to load, it can negatively affect the user experience and you might lose your visitors. So try to optimize the page speed as much as possible.
To optimize, you can install a caching and image optimization plugin such as WP Rocket and WP Smush (available for WordPress).
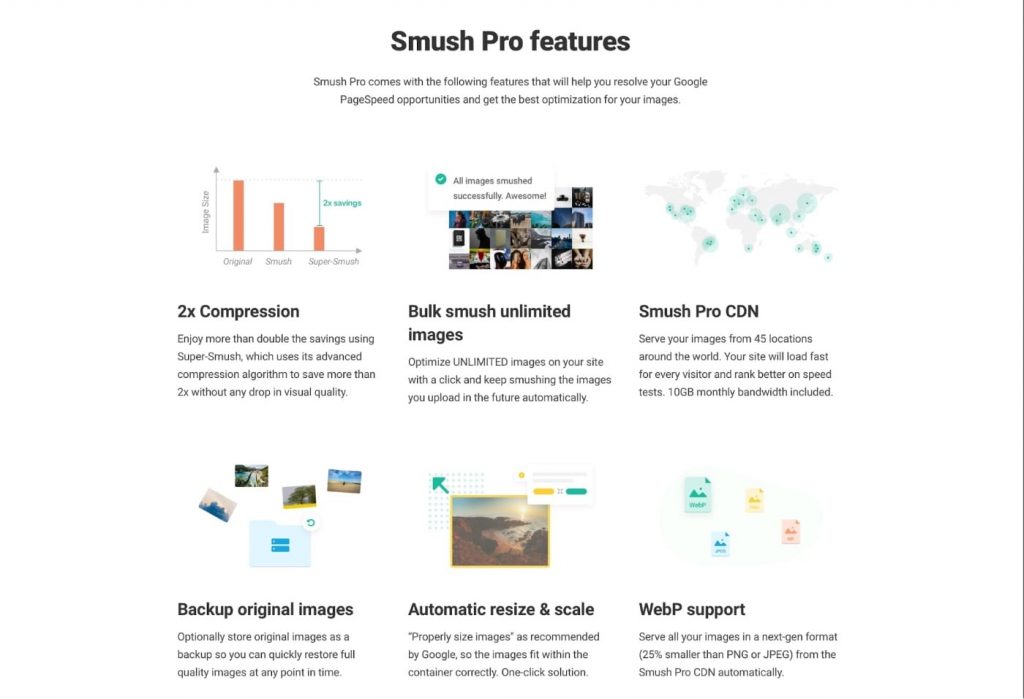
These two plugins will apply all the basic settings for you, which you can then tune according to your website performance.
Good UI
User interface (UI) refers to the website’s appearance, including colors, layout, typography, and other web design elements.
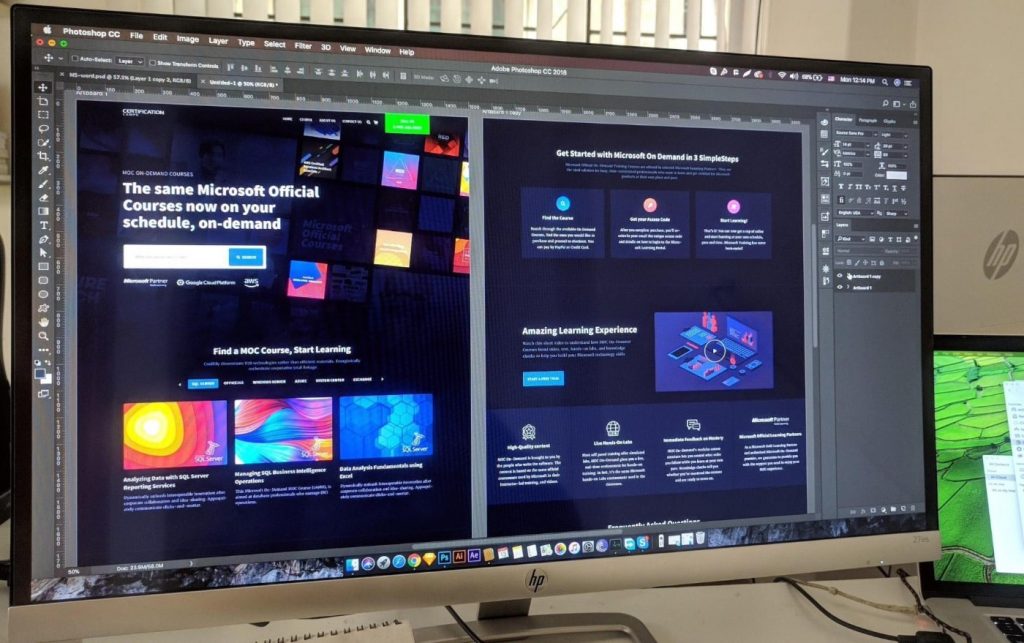
A good UI ensures that your users have a seamless browsing experience, leading to excellent user retention and more revenue.
You can create a good UI by:
- Maintaining consistency between different elements
- Using readable fonts instead of fancy ones
- Using colors and textures which draw the visitors’ attention
- Keeping important information clearly visible
Before the Launch Checklist
A website can make or break your reputation in the market. That’s why you need to make sure that your website is built properly.
So before launching a web site, take a look at this quick website-launch checklist:
- Include Important Pages: Make sure you’ve included all the important pages, such as the Home, Service, About, and Contact pages.
- Install Google Analytics and connect Google Search Console: To track organic traffic and bounce rate, install Google Analytics.
- Check Browser Compatibility: Many browsers are in the market, and your website should be compatible with all of them. The most important ones are Chrome, Mozilla Firefox, Safari, and Opera.
- Fast Page Load Speed: Keep the page load speed as high as possible for the best user experience.
- Install SSL Certificate: It is important to keep the website secured.
- Working Contact Form – Even one lost customer lead can cost you hundreds of dollars, so make sure you set up your contact form and email ID properly on your Contact page.
- Social Media Links: Your social media links should redirect people to your brand’s official pages.
- Check Images: The images should be clear and optimized.
- Mobile-Friendly: Optimize your website to work on all screen sizes, such as mobile, tablet, and desktop.
Frequently Asked Questions
To build a website from scratch, you’ll need a domain name and a web hosting provider. Once you’ve purchased both, you’ll need to install WordPress on your server to start building your website.
However, you can also create a website using website builders such as Wix, Squarespace, Weebly, etc. In this case, you don’t need to have a separate hosting and domain name.
Building website from scratch will most likely take in anywhere from one day to several months, depending on the features, design, and content. A typical website takes a minimum of two weeks to build completely, including content, design, development, and modifications.
Absolutely not. Regardless of the platform you choose, building a website from scratch is a piece of cake. Just follow the steps listed in this guide to get your website online the same day, with no hassle.
Unless you have a very specific reason to build a website from scratch, it does not make much practical sense to do so. Just go with WordPress, and 99.9% of the time it will work like a charm.
For example, creating a contact form can take hours of coding, whereas, with WordPress, you can deploy a contact form within a few minutes. That’s peace of mind!
Conclusion
That’s it!
Now you know everything you need to build your first website from scratch and start your journey on the internet.
To sum up:
- Zero in on your niche (this is important).
- Get a domain and hosting (go with SiteGround or Cloudways for a seamless experience).
- Install and set up WordPress in no time, with just a few clicks.
- Design your website (use page builders like Elementor or Divi for this).
- Finally, check everything and launch the website.
All of this can be confusing at first, but once you start the process and follow our guide, you’ll be able to get your website up and running within a day.
After that, you can spend as much time as you need to add the content and other stuff on the website.
If you need further help, please drop us a line and we will try to help you.
You can also ask us anything or share your thoughts in the comment section below.
Check also:
- How To Build a New WordPress Site While the Old Site Is Live (A Quick Guide)
- How Many Websites Are There in the World?
- What Is the Fastest Web Hosting? [Quick Answer]
- WordPress Pros and Cons (Explained)
- Why Is WordPress So Hard To Use? (Steps To Make WordPress Easy)
- How to Edit WordPress Site? (For Beginners)
- WordPress Page Builders – The Ultimate List with a Comparison Table
- Gutenberg vs Elementor: Ultimate Comparison Guide
- Wix vs WordPress: 4 Practical Differences You Should Know
- Shopify vs WordPress: Which is the Best Online Store Builder?
- How to Make a Webcomic Website (Step by Step Tutorial)
- How Much Data and Content is Created Every Day?
- Content Marketing Statistics, Facts and Trends
- 50+ Web Design Statistics To Get Powerful UX Results

Thanks Nick! That’s a load off my shoulders. I’ll be back when I need help.
Awesome! Glad you like it 🙂
This is a great tip, especially for those who are new to the blogosphere. Just brief and accurate information… Thanks for sharing this one. A must-read article.
Thank you for this very helpful guide. I would love to start a blog this year and grow it
Very detailed guide here. It’s very helpful to aspiring bloggers!
I would love to build a website from scratch. Id be very proud of myself if I can do this
I will also love to build a website from scratch, but with Gowebp best image optimization plugin.
Very Informative post. Thank you very much for sharing.
Thanks for sharing useful info.