⚡Quick Answer
- For Windows
- Access File Explorer and use the Previous Versions feature.
- Recover a file using the Backup and Restore feature, given you’ve previously created and saved backup on your Windows.
- Use the recovery functionalities of third-party data recovery tools.
- For MacOS
- Use the Time Machine feature, given that it is set up and turned on.
- Make use of third-party data recovery tools like Disk Drill or PhotoRec.
- Restore a lost file using the iCloud backup feature. It should also be enabled on your Mac.
Is Recovery of Files Really Possible?
Accidentally overwriting a file can be a frustrating experience, but the good news is that it is often possible to recover overwritten files on both Mac and Windows.
Additionally, many data recovery service providers claim at least a 95% success rate at recovering lost or corrupted data.
At the same time, you should not overlook the existing in-built data recovery features on Windows and MacOS.
In this article, we will provide a concise guide on how to recover overwritten files on both operating systems using diverse methods.
Recovery of Files on Windows
Let’s explore available recovery options for Windows users one by one.
Method 1: Previous Versions Feature
Prerequisites:
- You have administrative rights on your PC.
- Make sure the Previous Versions feature is enabled for the relevant drive or folder. As a rule, it is enabled by default.
Implementation:
- Open File Explorer: Navigate to the folder where the overwritten or lost file was located.
- Access File Properties: Right-click on the file you want to recover. Select Properties from the context menu.
- Navigate to the Previous Versions Tab: In the Properties window, go to the Previous Versions tab.
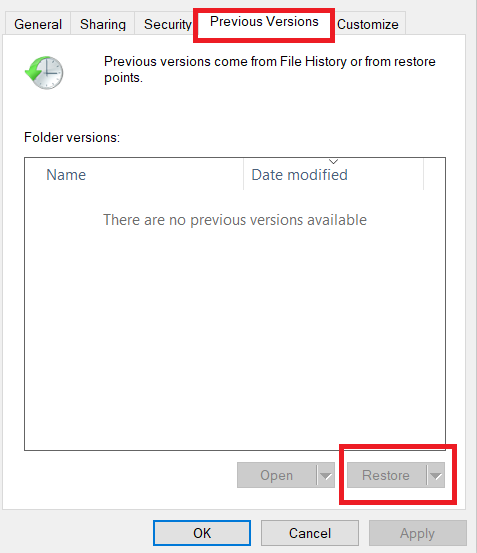
- View Available Versions: You’ll see a list of available versions of the file, along with their timestamps. These versions correspond to restore points created by Windows.
- Select the Right Version: Choose the version you want to restore. Consider the timestamp and content to ensure you’re selecting the correct one. Click on the desired version to highlight it.
- Preview the File (Optional): To verify that you’ve selected the right version, click the Open button. This will allow you to preview the file’s content.
- Restore the File: Click the Restore button. Windows will prompt you to confirm the restoration. Click OK.
- Check the Restored File: Go back to the original folder where the file was located. You should find the successfully restored version now.
⚠️”Previous Versions” option relies on restore points created by Windows. If this feature is disabled or no proper restore points exist, you won’t see any previous versions. The feature works best for files on local drives.
Method 2: Recovery From a Backup
Prerequisites:
- You have administrative rights on your PC.
- You’ve previously created a backup using the Backup and Restore feature.
- The media or drive of your saved backup is available.
Implementation:
- Connect the Backup Drive: Plug in the external drive or access the network location where your Windows backup is stored.
- Open Backup and Restore: Press Windows + S to open the search bar. Type “Backup and Restore” and select the corresponding result.
- Choose Restore My Files: In the Backup and Restore window, click on Restore My Files.
- Select the Backup Location: Choose the backup location (external drive) that contains your backup files. Click Next.
- Browse for Files/Folders: You’ll see a list of available backups. Select the one you want to restore from. Click Next.
- Choose the Files to Restore: Browse through the backup and select the specific files or folders you want to restore. Click Next.
- Specify the Destination: Decide where you want to restore the files:
- Original Location: Restores the files to their original location.
- In a Different Location: Allows you to choose a new folder.
- Click Restore.
- Wait for Restoration: Windows will begin restoring the selected files. Wait for the process to complete.
- Verify Restored Files: Navigate to the restored location (original or new folder) to confirm that the files are successfully restored.
Method 3: Using Data Recovery Software
If the previous methods don’t solve your recovery problems, data recovery software might come in handy. Many data recovery tools like Disk Drill, PhotoRec, Recuva, Stellar, etc. can be effectively used for this task.
Let’s assume that you accidentally overwrote an important Excel file and need to restore it. Let’s use the PhotoRec Data Recovery tool for this purpose to showcase the recovery capabilities of third-party software.
Implementation:
- Download and Install PhotoRec: Visit the PhotoRec Data Recovery website. Download and install the software on your Windows computer.
- Extract and Launch: Extract the downloaded file. PhotoRec comes with TestDisk; launch ‘
photorec_win.exe‘. You might need to run it as an administrator. - Select Drive: After launching, PhotoRec will display a list of available drives. Use the arrow keys to select the drive from which you lost your Excel file and press Enter. Remember, PhotoRec can recover files from various storage media like hard drives, CD-ROMs, USBs, and memory cards.
- Choose Partition and File System: Pick the partition that holds the Excel file. If unsure about the file system,
Otheris a safe default. - Select File Types: Limit the search to Excel files (
xlsx,xls) by deselecting other file types inFile Optto speed up the process. - Set Recovery Location: Specify a save location for recovered files that’s different from the source drive to avoid data overwriting.
- Start and Verify: Initiate the recovery process. Once done, check the specified location for your recovered Excel file
🚨 Check also: How To Restore a Previous Version on WordPress (User-Friendly Methods)
Recovery of Files on Mac
Now, let’s switch to the Mac platform and investigate several ways to restore files on your Mac.
Method 1: Time Machine Feature
Prerequisites:
- Time Machine is set up and configured to back up your Mac regularly.
- Make sure your Time Machine backup disk is connected to your Mac.
Implementation:
- Open Finder: Navigate to the folder where the overwritten or deleted file was located.
- Activate Time Machine: Click on the Time Machine icon in the menu bar (usually located at the top-right corner of your screen). Alternatively, you can use Spotlight to search for Time Machine and open it.
- Enter Time Machine: Select Enter Time Machine from the drop-down menu. A new window will appear, showing a visual timeline of your backups.
- Browse Backups: Use the arrows or the timeline on the edge of the screen to navigate through your local snapshots and backups. If you notice a flashing light or a semi-dark gray tick mark, it means the backup is either loading or being verified on the backup disk.
- Locate the File to Restore: Find the item (file or folder) you want to restore. Click on it to select it.
- Preview the File (Optional): Press the Space Bar to preview the file. This helps verify that you’ve selected the correct version.
- Restore the File: Click the Restore button. The selected file will be restored to its original location.
⚠️ Time Machine keeps multiple versions of your files, allowing you to go back in time and retrieve overwritten data. Regularly check your backups and ensure that your Time Machine drive is connected.
Method 2: Using Data Recovery Software
Many data recovery tools mentioned earlier function equally well for Mac too. To demonstrate their data recovery ability on Mac, let’s review the use of Disk Drill tool.
Implementation:
- Download and Install: Visit the official website of Disk Drill and download the software. Follow the on-screen instructions to install Disk Drill on your Mac.
- Launch Disk Drill: Open Disk Drill from your Applications folder or Launchpad.
- Select the Drive: Disk Drill will display a list of available drives and storage devices. Choose the drive where the overwritten or lost file was originally located.
- Scan for Lost Data: Click on the Scan button next to the selected drive. Disk Drill will start scanning the drive for recoverable files. The scanning process may take some time.
- Preview and Select the File: Once the scan is complete, Disk Drill will display a list of recoverable files. Use the preview feature to preview the files and locate the overwritten file you want to recover. Select the file by checking the box next to it.
- Recover the File: Click on the Recover button to initiate the file recovery process. Choose a location on your Mac where you want to save the recovered file. It is recommended to choose a different drive or external storage device to avoid overwriting any existing data.
- Wait for the Recovery to Complete: The time required for the recovery process will depend on the size of the file and the speed of your Mac.
- Verify the File: Once the recovery process is complete, navigate to the specified location and verify that the recovered file is intact and accessible.
⚠️ Note: Modern-day recovery tools are able to restore data even from emptied Trash on macOS. So, if you, on purpose or not, emptied your Trash Bin and then realized there were some important files, don’t lose hope!
Method 3: Recovery With Cloud Backups
Prerequisites:
- You have an active iCloud account and are signed in on your Mac.
- You have enabled iCloud Drive to back up your files.
Implementation:
- Access and Sign in to iCloud: Open a web browser on your Mac and visit iCloud.com. Enter your Apple ID and password to sign in to your iCloud account.
- Open iCloud Settings: Once signed in, click on the Settings icon on the iCloud homepage.
- Restore Files: Under the Advanced section, click on Restore Files.
- Select Files to Restore: You will see a list of available files to restore. Browse the list and select the files you want to recover by checking the boxes next to their names. If you want to restore all available files, you can click on Select All.
- Start the Restore Process: After selecting the files, click on the Restore Files button to initiate the restoration process.
- Wait for the Restore to Complete: The restoration process may take some time, depending on the size and number of files being restored.
- Access Restored Files: Once the restore process is finished, you can access the restored files on your Mac. They will be placed in their original locations, such as the iCloud Drive or the Desktop & Documents Folders.
⚠️ Remember: This method helps you recover files from iCloud, like those in your Desktop or Documents folders, if they were backed up. It’s useful for getting back files you accidentally deleted. But for bigger issues, like with your whole Mac or its apps, you might need Time Machine or macOS Recovery. Also, try to recover deleted files within 30 days, or they’ll be permanently gone.
Brief Summary
To sum up, there is a high likelihood of recovering lost and overwritten files on both Windows and Mac platforms. By following the methods reviewed in this guide, from in-built features to third-party data recovery, you can successfully restore critical data.
Remember, the sooner you act after data loss, the better your chances of effective recovery. Nonetheless, prevention is better than a cure. If you keep backing up your system regularly, you can avoid the hassle of recovering lost and overwritten data.