⚡ Quick Answer
1. Recover Individual Posts/Pages:
🟡 Go to the post, click the Post/Page box, and select Revisions
🟡 Compare the versions using the slider
🟡 Select a version, and click Restore.
2. Full Site Restore With Backup Plugin: If restoring a post or page doesn’t resolve the issue, you may need a full site backup recovery. We recommend using UpdraftPlus, as it’s highly favored among users.
🟡 In your WordPress dashboard, go to Plugins → Add New, search, install, and activate.
🟡 Go to your plugin’s backup settings, select a backup, and click Restore.
3. Restore via Hosting Backup: If you don’t have a backup plugin, check if your hosting provider offers recovery options. Some, like Siteground, provide automatic backups, even if you don’t have a backup plugin installed.
For the detailed information, please read below.
Restore a Previous Version of a Post/Page
Depending on the issue, you may not have to perform a full recovery backup. For example, if you lost or overwrote content by mistake, you can simply restore a previous version of that post or page.
Luckily, this is easy to do.
➡️ Step 1: Navigate to the post or page in question, then click on the “Post/Page” box in the right-hand corner. Click on the clock icon labeled “Revisions.”
➡️ Step 2: You’ll be brought to a comparison page, where you can see the differences between versions. Use the slider to scroll back and forth to view the versions.
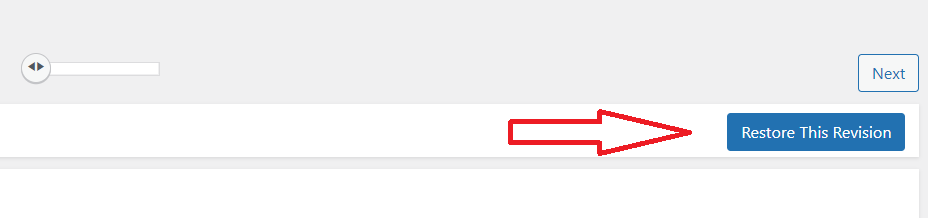
➡️ Step 3: Once you’ve identified the version you want to restore, click the blue “Restore This Revision” button.
➡️ Final Step: After restoring, review the content to confirm everything looks correct. The restored version is automatically saved, but if you make any further edits, be sure to save those changes manually.
Full Site Backup Restoration
If restoring a page or post doesn’t fix the issue, you might need a full site backup recovery.
📝 Note
Keep in mind that fully restoring WordPress should be a last resort, as it can affect your site’s performance and structure. Only do this as a last resort, like if your site was hacked or important files were lost.
1: Install a Backup WordPress Plugin
If you’re not well-versed in coding, we highly recommend choosing a plugin.
Based on our research, UpdraftPlus is one of the most recommended backup plugins. That’s why we decided to show the step-by-step process with Updraft, as it’s the plugin most users are interested in.
To download the Updraft plugin, go to “Plugins” → “Add New” and search for Updraft in the search.
From here, you can simply click on “Install Now” and then “Activate.”

2. Make a Backup or Set Up an Auto-Schedule
Now that you’ve installed your preferred plugin, it’s time to get a backup of your site. This is a must: you can’t restore a previous version on WordPress without a completed backup.
To set up your Updraft account, go to your WordPress “Settings” → “UpdraftPlus Backups” → “Settings” tab.
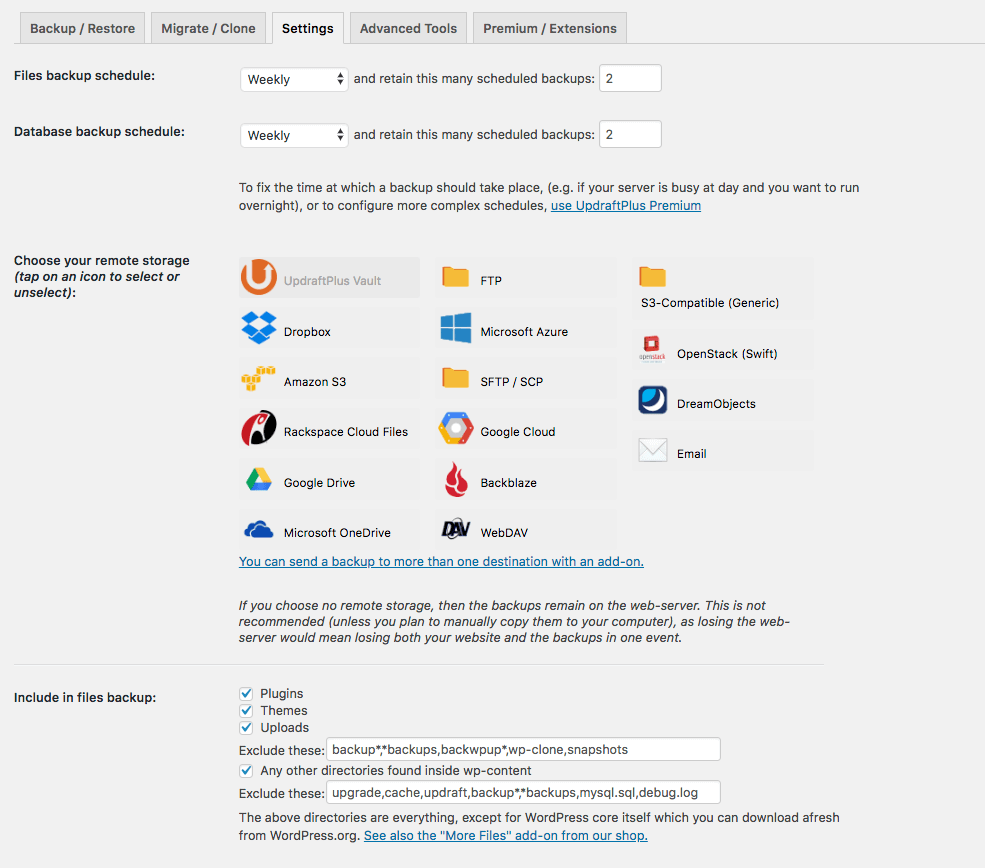
Once here, you can choose a backup schedule, as well as how many backups to store over time. You also get a choice for where you want them to be saved, such as Google Drive, Microsoft OneDrive, or some other file folder.
From here, you can follow the on-screen instructions for your preferred settings and click “Save Changes.”
If you set up automatic backups, Updraft will carry this out without you having to do anything further.
You can even view your “Next scheduled backups” to make sure it’s to your liking.
3. Restore a Previous Version From Any Listed
Now that you have a backup plan in place, you can access previous versions of WordPress and restore them as needed.
If you need to restore a previous version, simply head to “Settings” → “UpdraftPlus Backup/Restore” in your WordPress menu.
Scroll down to “Existing Backups.”
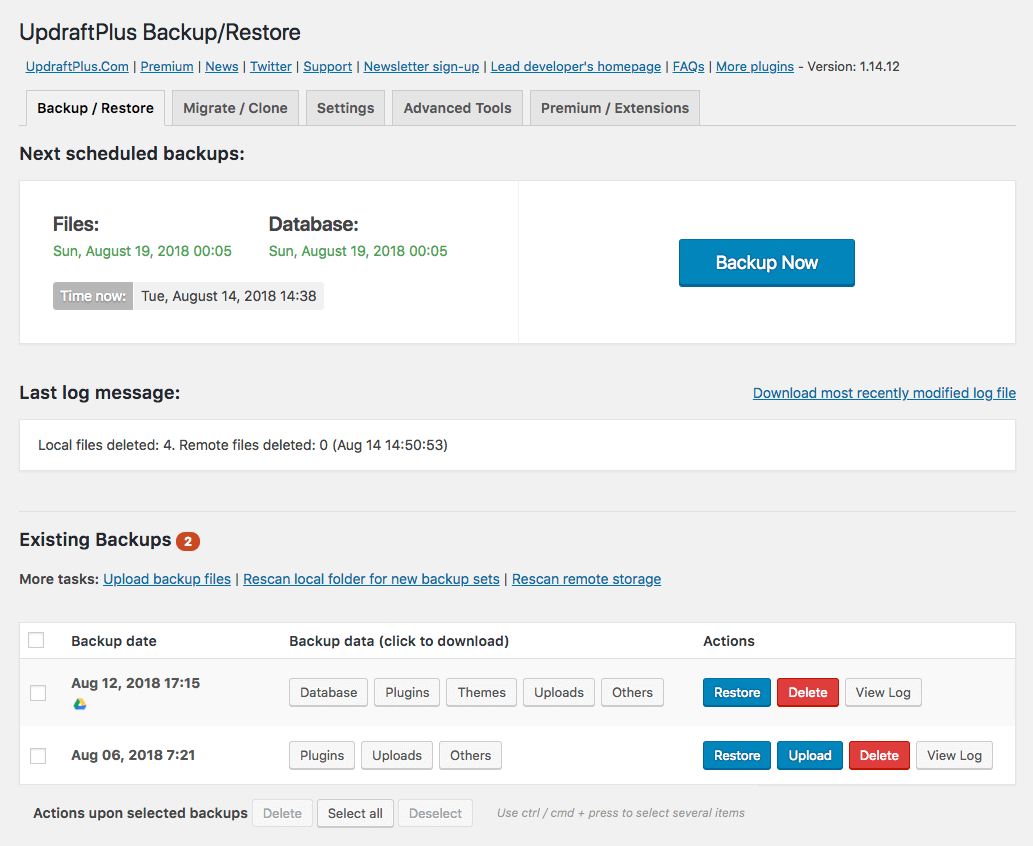
You’ll notice here a few existing backups to choose from. Decide which you prefer and click on the blue “Restore” button.
At this point, you’ll be shown a pop-up that asks what areas of your site you wish to restore. Select the areas that you require and then confirm “Restore.”
Once the restore has finished, you’ll be shown a pop-up that says “Restore has been successful.”
BONUS TIP: Restoring With Your Hosting Provider
Some hosting companies such as SiteGround provide automatic backups which means that even if you don’t have a backup plugin installed on your website you might still be able to restore your site from your hosting dashboard.
So, make sure you check with your hosting provider if they provide this function.
Safeguard Your WordPress Site With Siteefy
As long as you have a backup of your WordPress site, restoring a previous version is super easy. Using a plugin is the simplest way to manage regular backups and restores, so grab your favorite tool and start backing up your site today!
Want more tips on keeping your site safe and running smoothly?
Check out our Siteefy blog! And feel free to share your ideas with us—we’d love to hear them! 😊